
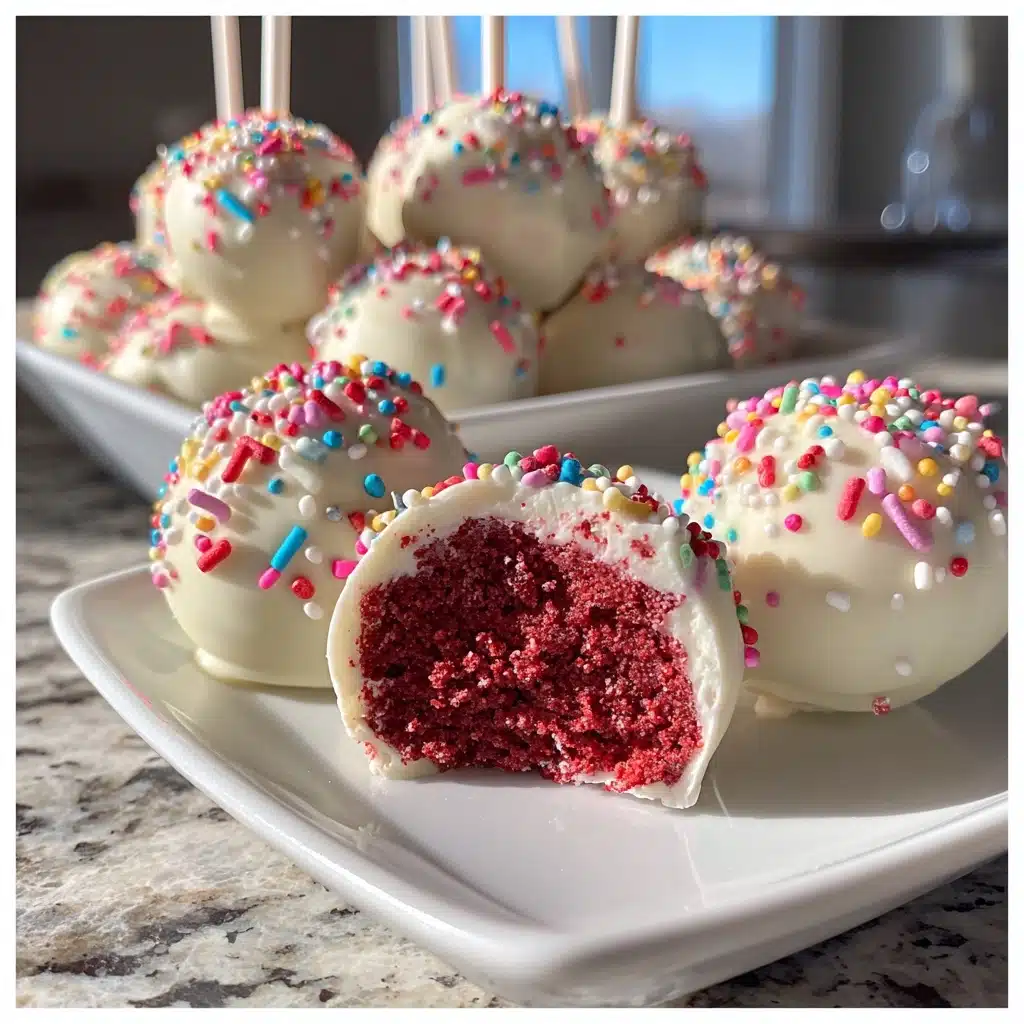
Irresistible Red Velvet Cake Pops: Sweet Bite-Sized Joy
There’s something magical about a sweet treat that brings joy in every bite, and these Irresistible Red Velvet Cake Pops do just that! Whether you’re juggling a busy schedule or planning a special gathering, these delightful cake pops are the perfect solution. They’re quick to whip up and even quicker to disappear! Imagine the smiles on your loved ones’ faces as they indulge in these vibrant, creamy bites. Trust me, once you make these, they’ll become your go-to dessert for any occasion, from birthday parties to cozy family nights.
Why You’ll Love This Irresistible Red Velvet Cake Pops
These Irresistible Red Velvet Cake Pops are not just a feast for the eyes; they’re a breeze to make! With minimal prep time, you can create a stunning dessert that tastes as good as it looks. The rich, velvety flavor combined with creamy frosting makes each bite a little piece of heaven. Plus, they’re perfect for sharing, making them a hit at any gathering!
Ingredients for Irresistible Red Velvet Cake Pops
Gathering the right ingredients is the first step to creating these Irresistible Red Velvet Cake Pops. Here’s what you’ll need:
- Red velvet cake mix: This is the star of the show! It provides that rich color and flavor we all love.
- Large eggs: They help bind the cake together, giving it a moist texture.
- Vegetable oil: This adds moisture and richness to the cake, making it tender.
- Water: A simple ingredient that helps activate the cake mix and keeps it fluffy.
- Cream cheese frosting: This is the secret to making your cake pops irresistibly creamy and delicious.
- White chocolate: Melted for dipping, it adds a sweet, smooth coating that complements the cake perfectly.
- Sprinkles: These are optional but add a fun, festive touch to your cake pops!
For those looking to switch things up, you can use homemade cake mix or even a gluten-free version. Just remember, the exact quantities for each ingredient are listed at the bottom of the article for easy printing!
How to Make Irresistible Red Velvet Cake Pops
Creating these Irresistible Red Velvet Cake Pops is a delightful journey! Follow these simple steps, and you’ll have a batch of sweet joy ready to impress. Let’s dive into the process!
Step 1: Preheat the Oven
Preheating your oven to 350°F (175°C) is crucial. This ensures that your cake bakes evenly and rises beautifully. A hot oven helps create that perfect texture we all crave in a cake!
Step 2: Prepare the Cake Mix
Grab your box of red velvet cake mix and follow the package instructions. Usually, this involves mixing the cake mix with eggs, oil, and water. It’s as easy as pie—well, cake!
Step 3: Bake the Cake
Pour the batter into a 9×13 inch pan and bake for 30-35 minutes. To check if it’s done, insert a toothpick in the center. If it comes out clean, your cake is ready to cool!
Step 4: Cool the Cake
Once baked, let the cake cool completely. This step is vital! If you crumble it while warm, you’ll end up with a gooey mess instead of perfect cake pops.
Step 5: Crumble the Cake
When the cake is cool, crumble it into a large bowl. Use your hands or a fork to break it into fine pieces. The finer the crumble, the better your cake pops will hold together!
Step 6: Mix with Frosting
Add the cream cheese frosting to the crumbled cake. Mix until everything is well combined. The frosting binds the cake together, creating a deliciously moist mixture!
Step 7: Form Cake Balls
Now, it’s time to shape the mixture into small balls. Aim for about one inch in diameter. Roll them gently in your hands to create a smooth surface. This is where the magic begins!
Step 8: Chill the Cake Balls
Place the formed cake balls on a baking sheet and chill them in the refrigerator for at least one hour. Chilling helps them firm up, making it easier to dip them in chocolate later.
Step 9: Insert Lollipop Sticks
Take your lollipop sticks and dip one end into melted white chocolate. This helps the stick stay in place. Then, gently insert the stick into each cake ball, about halfway through.
Step 10: Dip in White Chocolate
Now for the fun part! Dip each cake pop into the melted white chocolate. Make sure to let the excess chocolate drip off. This creates a smooth, even coating that looks fabulous!
Step 11: Decorate with Sprinkles
Before the chocolate sets, sprinkle your favorite toppings on the cake pops. Get creative! Use colorful sprinkles, crushed nuts, or even edible glitter for a festive touch.
Step 12: Cool Completely
Finally, let the cake pops cool completely before serving. This allows the chocolate to harden, ensuring your pops are ready for that first delightful bite!
Tips for Success
- Make sure your cake is completely cool before crumbling to avoid a sticky mess.
- Use a cookie scoop for uniform cake balls; this ensures even baking and a polished look.
- Experiment with different sprinkles or toppings for a unique twist on your cake pops.
- Keep the melted chocolate warm while dipping to maintain a smooth consistency.
- Store leftover cake pops in the fridge for a sweet treat later!
Equipment Needed for Irresistible Red Velvet Cake Pops
- Mixing bowl: A large bowl for combining ingredients. A sturdy plastic or glass bowl works well.
- 9×13 inch baking pan: Essential for baking the cake. You can use any similar-sized pan.
- Cookie scoop: For uniform cake balls. A tablespoon works in a pinch!
- Baking sheet: To chill the cake balls. Any flat surface will do.
- Lollipop sticks: For serving. Skewers can be a fun alternative!
Variations of Irresistible Red Velvet Cake Pops
- Chocolate Cake Pops: Swap the red velvet cake mix for a chocolate cake mix for a rich, chocolatey twist.
- Gluten-Free Option: Use a gluten-free cake mix to make these cake pops suitable for those with dietary restrictions.
- Nutty Delight: Add crushed nuts to the cake mixture for a delightful crunch in every bite.
- Flavor Infusion: Mix in a teaspoon of vanilla or almond extract to enhance the flavor profile.
- Vegan Version: Substitute eggs with flaxseed meal and use a dairy-free frosting for a vegan-friendly treat.
- Mini Cake Pops: Make smaller cake balls for bite-sized treats that are perfect for parties!
Serving Suggestions for Irresistible Red Velvet Cake Pops
- Pair with a glass of cold milk for a classic treat that everyone loves.
- Serve alongside a scoop of vanilla ice cream for an indulgent dessert experience.
- Display on a decorative cake stand for a stunning presentation at parties.
- Include them in a dessert buffet for a colorful and inviting spread.
- Wrap in clear bags tied with ribbons for delightful party favors!
FAQs about Irresistible Red Velvet Cake Pops
Can I use a different cake mix?
Absolutely! While I adore the classic red velvet flavor, you can easily swap it for chocolate or vanilla cake mix. The process remains the same, and you’ll still end up with delightful cake pops!
How do I store leftover cake pops?
Store your Irresistible Red Velvet Cake Pops in an airtight container in the refrigerator. They’ll stay fresh for up to a week, making them a perfect treat for later!
Can I freeze cake pops?
Yes, you can freeze them! Just make sure they’re completely cooled and set before placing them in a freezer-safe container. They can last up to three months in the freezer.
What can I use instead of cream cheese frosting?
If cream cheese frosting isn’t your thing, you can use chocolate frosting or even a simple buttercream. Each option will give your cake pops a unique flavor twist!
How can I make my cake pops more festive?
Get creative with your decorations! Use colorful sprinkles, edible glitter, or even drizzle melted chocolate in different colors over the pops for a fun and festive look!
Summarizing the Joy of Irresistible Red Velvet Cake Pops
Making these Irresistible Red Velvet Cake Pops is more than just baking; it’s about creating sweet memories. Each bite is a burst of flavor, bringing smiles to faces young and old. Whether you’re celebrating a special occasion or simply treating yourself, these cake pops are a delightful way to spread joy. The vibrant color and creamy texture make them a feast for the eyes and the taste buds. So, roll up your sleeves, gather your loved ones, and dive into this fun baking adventure. Trust me, the joy of sharing these treats is simply irresistible!
PrintIrresistible Red Velvet Cake Pops for Sweet Joy Today!

Delicious and visually appealing red velvet cake pops that are perfect for any occasion.
- Prep Time: 30 minutes
- Cook Time: 35 minutes
- Total Time: 1 hour 30 minutes
- Yield: 24 cake pops 1x
- Category: Dessert
- Method: Baking and Dipping
- Cuisine: American
- Diet: Vegetarian
Ingredients
- 1 box red velvet cake mix
- 3 large eggs
- 1 cup vegetable oil
- 1 cup water
- 1 cup cream cheese frosting
- 1 lb white chocolate, melted
- Sprinkles for decoration
Instructions
- Preheat the oven to 350°F (175°C).
- Prepare the red velvet cake mix according to package instructions.
- Bake the cake in a 9×13 inch pan for 30-35 minutes.
- Allow the cake to cool completely.
- Crumble the cooled cake into a large bowl.
- Add cream cheese frosting to the crumbled cake and mix until well combined.
- Form the mixture into small balls and place them on a baking sheet.
- Chill the cake balls in the refrigerator for at least 1 hour.
- Dip the end of a lollipop stick into melted white chocolate and insert it into each cake ball.
- Dip each cake pop into the melted white chocolate and let excess chocolate drip off.
- Decorate with sprinkles before the chocolate sets.
- Allow the cake pops to cool completely before serving.
Notes
- Make sure the cake is completely cooled before crumbling.
- Use a variety of sprinkles for a fun look.
- Store in the refrigerator for up to a week.
Nutrition
- Serving Size: 1 cake pop
- Calories: 150
- Sugar: 12g
- Sodium: 50mg
- Fat: 7g
- Saturated Fat: 4g
- Unsaturated Fat: 2g
- Trans Fat: 0g
- Carbohydrates: 20g
- Fiber: 1g
- Protein: 2g
- Cholesterol: 30mg
About the Author

Marianne
kitchen guide and fellow food
Hi, we’re Marianne Hi there, and welcome to Recipes Days! I’m Marianne, your kitchen guide and fellow food lover. If you’ve ever felt overwhelmed by complicated recipes or thought, “I don’t have time to cook something good,” I’ve been there too. That’s why Recipes Days exists—to make cooking feel effortless, fun, and full of flavor, no matter your experience level.


