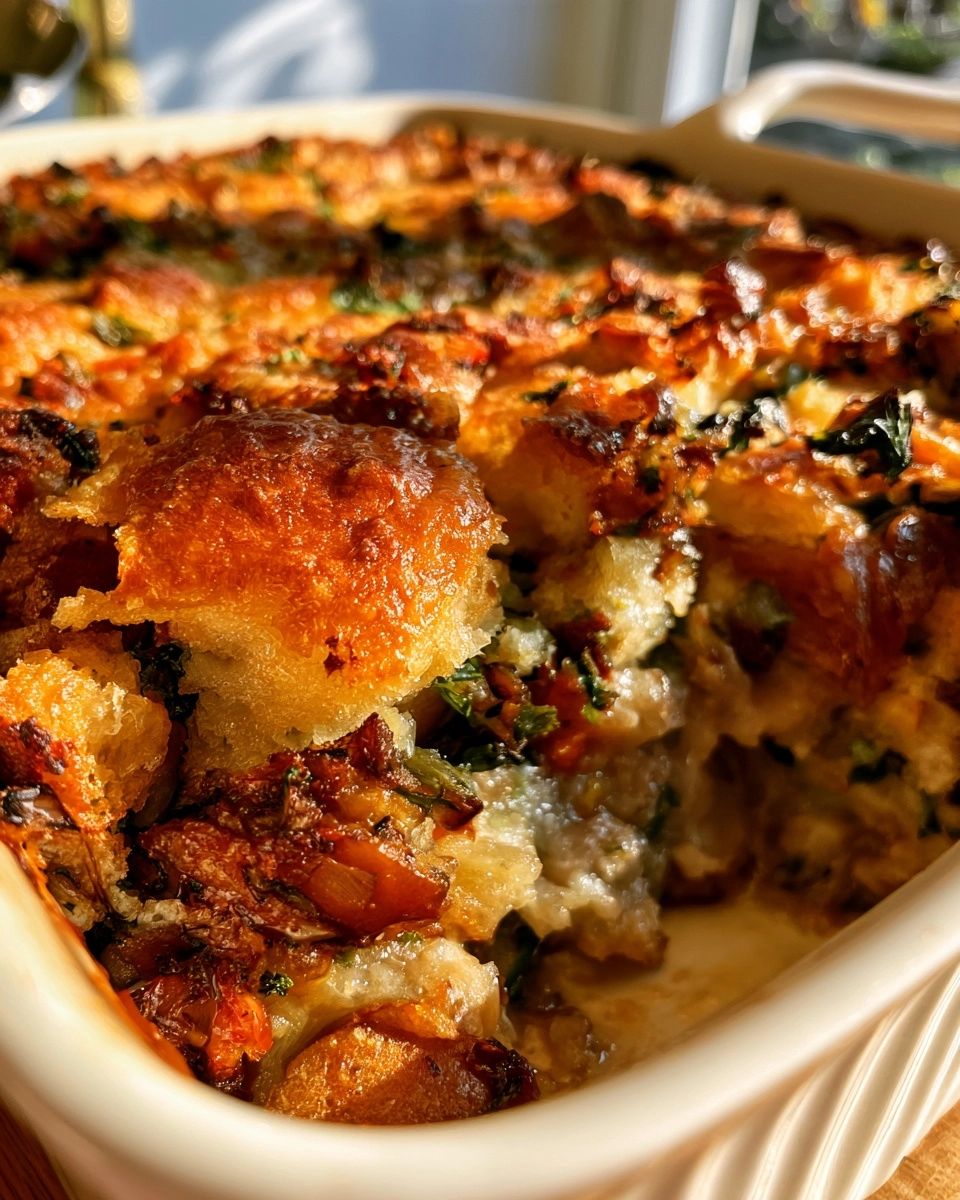
Make-Ahead Stuffing — Stuffing You Prep Days Ahead, Crisp on Top
As the holiday season approaches, I find myself searching for ways to simplify my cooking while still impressing my family and friends. That’s where this Make-Ahead Stuffing comes in! It’s a delightful dish that you can prepare days in advance, allowing you to focus on other festive preparations. With its savory blend of herbs, buttery bread, and a crisp top, this stuffing is sure to be a hit at your holiday table. Whether it’s Thanksgiving or a cozy family gathering, this recipe is easy, delicious, and perfect for any occasion!
Why You’ll Love This Make-Ahead Stuffing
This Make-Ahead Stuffing is a game-changer for busy moms and professionals alike. It’s incredibly easy to make, with straightforward steps that even novice cooks can follow. The flavor is a delightful mix of savory herbs and buttery bread, creating a comforting dish that everyone will love. Plus, it’s family-friendly, appealing to both kids and adults. Best of all, you can prepare it ahead of time, freeing up your schedule for more holiday fun!
Easy to Make
With just a few simple steps, you can whip up this stuffing without breaking a sweat.
Delicious Flavor
The combination of herbs and butter creates a mouthwatering aroma that fills your kitchen.
Family-Friendly
This stuffing is a crowd-pleaser, making it perfect for family gatherings and holiday feasts.
Make-Ahead Friendly
Prepare it days in advance, so you can enjoy the festivities without the last-minute rush.
Ingredients for Make-Ahead Stuffing
Main Ingredients
- Loaf of bread, cubed: The base of your stuffing, providing that delightful texture.
- Celery, chopped: Adds a fresh crunch and subtle flavor.
- Onion, chopped: Brings sweetness and depth to the dish.
- Butter: Essential for sautéing and enriching the stuffing.
- Chicken broth: Moistens the bread and infuses it with savory goodness.
- Sage: A classic herb that gives stuffing its signature flavor.
- Thyme: Complements the sage with its earthy notes.
- Salt and pepper: Enhances all the flavors and balances the dish.
- Dried cranberries (optional): Adds a touch of sweetness and color.
Optional Add-Ins
- Nuts: Chopped walnuts or pecans for added crunch.
- Other dried fruits: Raisins or apricots for a different flavor profile.
- Cooked sausage: For a heartier stuffing with a savory kick.
- Fresh herbs: Parsley or rosemary for a burst of freshness.
Ingredient Notes
- Substitutions: Use vegetable broth for a vegetarian version or gluten-free bread for a gluten-free option.
- Recommended brands: Look for high-quality, low-sodium chicken broth to control salt levels.
- Fresh vs frozen: Fresh herbs are best for flavor, but dried herbs work well too if that’s what you have on hand.
Kitchen Equipment
- Large skillet: A non-stick skillet works well for sautéing.
- Mixing bowl: Any large bowl will do for combining ingredients.
- Baking dish: A 9×13 inch dish is perfect for this stuffing.
- Measuring cups and spoons: Essential for accurate ingredient amounts.
- Foil: To cover the dish while refrigerating and baking.
How to Make Make-Ahead Stuffing
Step 1: Prepare the Ingredients
Start by gathering all your ingredients. Cube the loaf of bread into bite-sized pieces and set it aside. Chop the celery and onion into small pieces. This will help them cook evenly and blend well into the stuffing. Next, measure out your herbs and spices. Having everything ready makes the cooking process smoother and more enjoyable!
Step 2: Mix or Assemble
In a large skillet, melt the butter over medium heat. Once it’s melted, add the chopped onions and celery. Sauté them for about 5-7 minutes until they’re soft and fragrant. Then, stir in the sage, thyme, salt, and pepper. Cook for another minute to release the flavors. In a large mixing bowl, combine the cubed bread, sautéed vegetables, and optional dried cranberries. Pour the chicken broth over the mixture and gently stir until the bread is evenly moistened. You want it to be moist but not soggy!
Step 3: Cook or Bake
Preheat your oven to 350°F (175°C). Transfer the stuffing mixture into a greased baking dish. Cover it with foil to keep the moisture in while it bakes. Bake for 30-40 minutes. You’ll know it’s done when the top is golden brown and crispy. If you like an extra crispy top, remove the foil for the last 10 minutes of baking!
Step 4: Finish and Garnish
Once your stuffing is baked to perfection, take it out of the oven and let it cool for a few minutes. This helps the flavors settle. If you want to add a touch of freshness, sprinkle some chopped parsley on top before serving. It adds a lovely color and a burst of flavor!
Step 5: Serve
Now it’s time to enjoy your delicious Make-Ahead Stuffing! Serve it warm alongside your favorite holiday dishes. It pairs beautifully with turkey, ham, or even a hearty vegetarian main. Your family and friends will be raving about it, and you’ll love how easy it was to prepare!
Expert Tips for Success
- Use Fresh Ingredients: Fresh herbs and vegetables enhance the flavor of your stuffing.
- Don’t Overcook: Keep an eye on the baking time to ensure a crispy top without burning.
- Measure Accurately: Use measuring cups and spoons for precise ingredient amounts, ensuring consistent results.
- Follow Timing Carefully: Stick to the recommended baking times for the best texture and flavor.
- Common Pro Tips: For extra flavor, consider adding a splash of white wine to the broth.
Recipe Variations for Make-Ahead Stuffing
Healthier Version
- Use whole grain or sprouted bread for added fiber and nutrients.
- Replace butter with olive oil or avocado oil to reduce saturated fat.
- Incorporate more vegetables like mushrooms, carrots, or spinach for extra vitamins.
Vegetarian Version
- Substitute chicken broth with vegetable broth for a meat-free option.
- Add sautéed mushrooms for a rich, umami flavor.
- Include nuts like walnuts or pecans for added protein and crunch.
Gluten-Free Version
- Use gluten-free bread to make this stuffing suitable for those with gluten sensitivities.
- Ensure that your broth is gluten-free; many brands offer this option.
- Consider adding quinoa or rice for a different texture and flavor.
Spicy Version
- Add diced jalapeños or red pepper flakes for a kick of heat.
- Incorporate spicy sausage for a heartier, flavorful stuffing.
- Mix in some chipotle powder for a smoky flavor profile.
Extra Indulgent Version
- Stir in some crumbled bacon or pancetta for a savory twist.
- Top with shredded cheese before baking for a gooey, cheesy layer.
- Drizzle with a bit of truffle oil before serving for a luxurious finish.
What to Serve With Make-Ahead Stuffing
Side Dishes
- Roasted Brussels sprouts for a crunchy contrast.
- Garlic mashed potatoes to soak up all the flavors.
- Green bean casserole for a classic touch.
Sauces and Toppings
- Cranberry sauce for a sweet and tart balance.
- Gravy to add richness and moisture.
- Chopped fresh herbs for a pop of color.
Drinks
- Chardonnay or Pinot Noir to complement the flavors.
- Sparkling cider for a festive non-alcoholic option.
Desserts
- Pumpkin pie for a seasonal favorite.
- Apple crisp for a warm, comforting finish.
Storage Instructions for Make-Ahead Stuffing
Refrigerator
- Store any leftover stuffing in an airtight container in the refrigerator.
- It will keep well for up to 3-4 days, making it perfect for post-holiday meals.
- Before serving, check for freshness and discard if there are any signs of spoilage.
Freezer
- If you want to keep it longer, freeze the stuffing in a freezer-safe container.
- It can be frozen for up to 2-3 months without losing flavor.
- For best results, portion it out into smaller containers for easy thawing.
Reheating
- To reheat, thaw the stuffing in the refrigerator overnight if frozen.
- Preheat your oven to 350°F (175°C) and place the stuffing in a greased baking dish.
- Cover with foil and bake for about 20-30 minutes, or until heated through.
- For a crispy top, remove the foil for the last 10 minutes of baking.
Common Mistakes to Avoid
- Using stale bread: Fresh bread absorbs moisture better and gives a better texture.
- Not seasoning enough: Don’t skimp on herbs and spices; they are key to flavorful stuffing.
- Overmixing the bread: Stir gently to avoid mushy stuffing; you want some texture.
- Skipping the resting time: Letting the stuffing sit after baking allows flavors to meld.
FAQs about Make-Ahead Stuffing
Can I make this ahead of time?
Absolutely! This Make-Ahead Stuffing is designed for convenience. You can prepare it up to two days in advance, store it in the refrigerator, and bake it just before serving. This way, you can enjoy more time with your loved ones during the holidays!
Can I freeze Make-Ahead Stuffing?
Yes, you can freeze this stuffing! Just make sure to store it in a freezer-safe container. It will keep well for 2-3 months. When you’re ready to enjoy it, thaw it in the refrigerator overnight and reheat it in the oven for the best texture.
What type of bread is best for stuffing?
For the best results, use a loaf of bread that’s a day or two old. A crusty bread like sourdough or French bread works wonderfully, as it holds up well when mixed with broth. You can also use whole grain or gluten-free bread if you prefer!
How do I make stuffing vegetarian?
To make a vegetarian version of this Make-Ahead Stuffing, simply substitute chicken broth with vegetable broth. You can also add sautéed mushrooms or nuts for extra flavor and texture!
Can I add meat to the stuffing?
Definitely! If you want a heartier stuffing, feel free to add cooked sausage or diced turkey. Just mix it in with the other ingredients before baking. It adds a delicious savory element that many people love!
Recipe Card for Make-Ahead Stuffing
| Prep Time | 30 minutes |
|---|---|
| Cook Time | 40 minutes |
| Total Time | 1 hour 10 minutes |
| Servings | 8 servings |
| Calories | 250 per serving |
Ingredients
- 1 loaf of bread, cubed
- 1 cup of celery, chopped
- 1 cup of onion, chopped
- 1/2 cup of butter
- 2 cups of chicken broth
- 1 tablespoon of sage
- 1 tablespoon of thyme
- 1 teaspoon of salt
- 1/2 teaspoon of pepper
- 1/2 cup of dried cranberries (optional)
Instructions
- Preheat the oven to 350°F (175°C).
- In a large skillet, melt the butter over medium heat and sauté the onions and celery until soft.
- Add the sage, thyme, salt, and pepper, and stir to combine.
- In a large bowl, combine the cubed bread, sautéed vegetables, and dried cranberries.
- Pour the chicken broth over the mixture and stir until the bread is evenly moistened.
- Transfer the stuffing to a greased baking dish and cover with foil.
- Refrigerate for up to 2 days if making ahead.
- When ready to bake, remove the foil and bake for 30-40 minutes until the top is crisp and golden.
Notes
- For a vegetarian version, substitute vegetable broth for chicken broth.
- Feel free to add nuts or other dried fruits for extra flavor.
- This stuffing can be made gluten-free by using gluten-free bread.
Make-Ahead Stuffing — Stuffing You Prep Days Ahead, Crisp on Top
This Make-Ahead Stuffing is not just a dish; it’s a celebration of flavors and memories shared around the table. The joy of preparing it days in advance means you can savor the holiday spirit without the last-minute chaos. With its crispy top and savory goodness, it’s bound to become a family favorite. I encourage you to try this recipe and experience the delight it brings to your gatherings. If you love it as much as I do, please leave a review or comment below. I’d love to hear your thoughts and any personal twists you add!
PrintMake-Ahead Stuffing: Perfect Your Holiday Feast Today!

A delicious make-ahead stuffing recipe that can be prepared days in advance and baked to a perfect crisp on top, ideal for holiday feasts.
- Prep Time: 30 minutes
- Cook Time: 40 minutes
- Total Time: 1 hour 10 minutes
- Yield: 8 servings 1x
- Category: Side Dish
- Method: Baking
- Cuisine: American
- Diet: Vegetarian
Ingredients
- 1 loaf of bread, cubed
- 1 cup of celery, chopped
- 1 cup of onion, chopped
- 1/2 cup of butter
- 2 cups of chicken broth
- 1 tablespoon of sage
- 1 tablespoon of thyme
- 1 teaspoon of salt
- 1/2 teaspoon of pepper
- 1/2 cup of dried cranberries (optional)
Instructions
- Preheat the oven to 350°F (175°C).
- In a large skillet, melt the butter over medium heat and sauté the onions and celery until soft.
- Add the sage, thyme, salt, and pepper, and stir to combine.
- In a large bowl, combine the cubed bread, sautéed vegetables, and dried cranberries.
- Pour the chicken broth over the mixture and stir until the bread is evenly moistened.
- Transfer the stuffing to a greased baking dish and cover with foil.
- Refrigerate for up to 2 days if making ahead.
- When ready to bake, remove the foil and bake for 30-40 minutes until the top is crisp and golden.
Notes
- For a vegetarian version, substitute vegetable broth for chicken broth.
- Feel free to add nuts or other dried fruits for extra flavor.
- This stuffing can be made gluten-free by using gluten-free bread.
Nutrition
- Serving Size: 1 cup
- Calories: 250
- Sugar: 3g
- Sodium: 500mg
- Fat: 12g
- Saturated Fat: 7g
- Unsaturated Fat: 3g
- Trans Fat: 0g
- Carbohydrates: 30g
- Fiber: 2g
- Protein: 5g
- Cholesterol: 30mg
About the Author

Marianne
kitchen guide and fellow food
Hi, we’re Marianne Hi there, and welcome to Recipes Days! I’m Marianne, your kitchen guide and fellow food lover. If you’ve ever felt overwhelmed by complicated recipes or thought, “I don’t have time to cook something good,” I’ve been there too. That’s why Recipes Days exists—to make cooking feel effortless, fun, and full of flavor, no matter your experience level.