
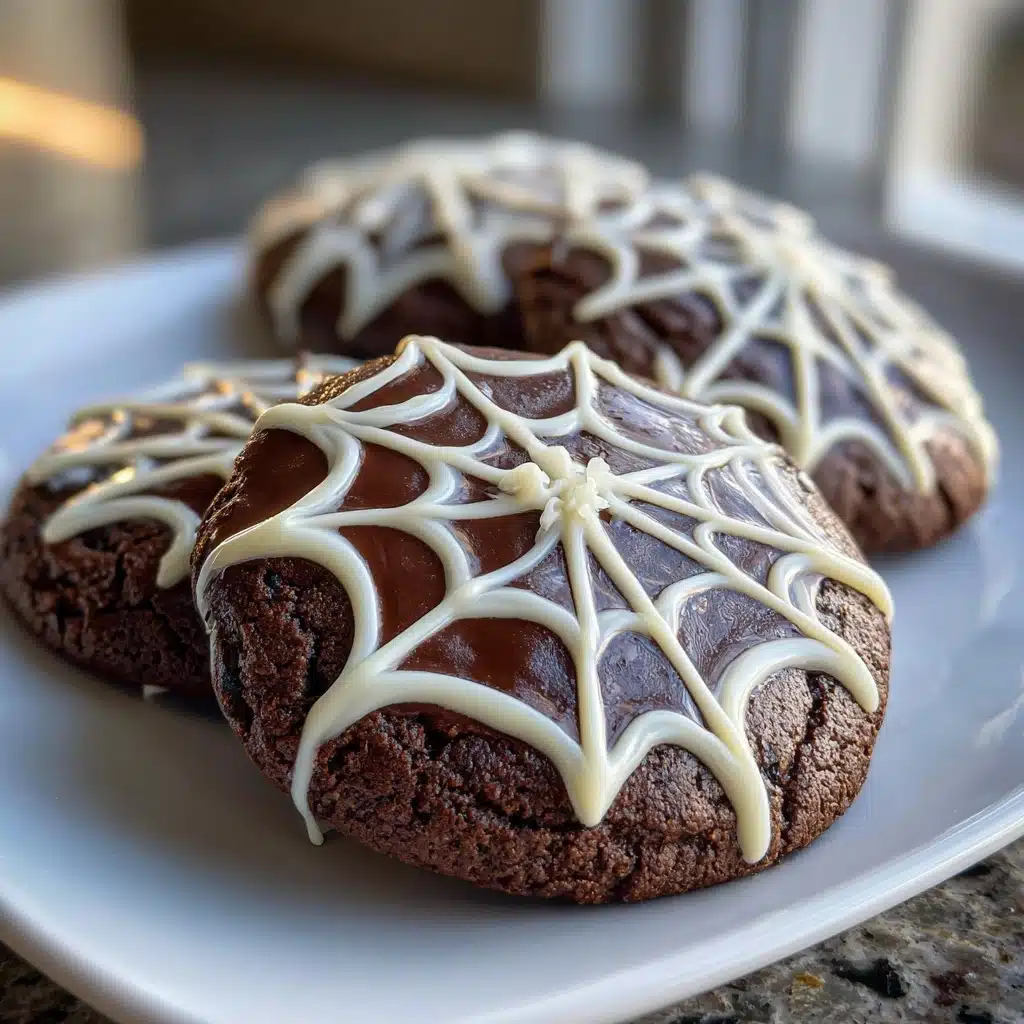
Irresistible Spiderweb Chocolate Cookies for Halloween Fun
As the leaves turn and the air gets crisp, I find myself dreaming of cozy kitchens filled with the aroma of baking. These Irresistible Spiderweb Chocolate Cookies for Halloween Fun are my go-to treat for this festive season. They’re not just delicious; they’re a quick solution for busy days when you want to impress your loved ones. With a spooky twist, these cookies bring joy to any gathering. Plus, they’re simple enough to whip up even when life gets hectic. Trust me, your family will love them, and you’ll enjoy making them!
Why You’ll Love This Irresistible Spiderweb Chocolate Cookies for Halloween Fun
These cookies are a delightful blend of ease and flavor, making them perfect for busy moms and professionals alike. In just 32 minutes, you can create a batch that’s sure to impress. The rich chocolate flavor paired with the fun spiderweb design adds a festive touch. Plus, they’re a hit with kids and adults, ensuring smiles all around during your Halloween celebrations!
Ingredients for Irresistible Spiderweb Chocolate Cookies for Halloween Fun
Gathering the right ingredients is the first step to creating these delightful cookies. Here’s what you’ll need:
- Unsalted butter: This adds richness and helps create a soft texture.
- Granulated sugar: Sweetens the cookies and contributes to their crisp edges.
- Brown sugar: Adds moisture and a hint of caramel flavor.
- Large eggs: These provide structure and moisture, making the cookies chewy.
- Vanilla extract: A must for enhancing the overall flavor profile.
- All-purpose flour: The base of the cookies, giving them structure.
- Unsweetened cocoa powder: This is what gives the cookies their rich chocolate flavor.
- Baking soda: Helps the cookies rise and become fluffy.
- Salt: Balances the sweetness and enhances the flavors.
- White chocolate chips: These add a creamy sweetness that contrasts beautifully with the dark chocolate.
- Black icing: Perfect for creating the spooky spiderweb design on top.
For those looking to switch things up, consider using dark cocoa powder for a more intense chocolate flavor. You can also add Halloween-themed sprinkles for an extra festive touch! The exact quantities for each ingredient are available at the bottom of the article for easy printing.
How to Make Irresistible Spiderweb Chocolate Cookies for Halloween Fun
Step 1: Preheat the Oven
Preheating your oven to 350°F (175°C) is crucial for baking cookies. This ensures that the cookies bake evenly and achieve that perfect texture. If the oven isn’t hot enough, your cookies may spread too much or not rise properly. Trust me, a well-preheated oven is your best friend!
Step 2: Cream the Butter and Sugars
In a large bowl, cream together the softened butter, granulated sugar, and brown sugar until smooth. This process incorporates air into the mixture, giving your cookies a light and fluffy texture. It’s like giving your cookies a little spa treatment before they hit the oven!
Step 3: Add Eggs and Vanilla
Next, add the eggs and vanilla extract to the creamed mixture. These ingredients not only enhance the flavor but also add moisture, making your cookies chewy and delicious. It’s the secret to that melt-in-your-mouth experience that everyone loves!
Step 4: Combine Dry Ingredients
In a separate bowl, whisk together the all-purpose flour, cocoa powder, baking soda, and salt. Each dry ingredient plays a role: flour provides structure, cocoa gives that rich chocolate flavor, baking soda helps them rise, and salt balances the sweetness. Together, they create the perfect cookie foundation!
Step 5: Mix Wet and Dry Ingredients
Gradually add the dry ingredients to the wet mixture, mixing until just combined. Be careful not to overwork the dough, as this can lead to tough cookies. You want to mix until you see no more flour, but still keep that lovely, soft texture!
Step 6: Fold in White Chocolate Chips
Now, it’s time to fold in those white chocolate chips. They add a creamy sweetness that beautifully contrasts with the rich chocolate cookies. Plus, who can resist that delightful burst of flavor with every bite? It’s like a little surprise waiting to happen!
Step 7: Shape and Bake the Cookies
Drop spoonfuls of dough onto a baking sheet lined with parchment paper, spacing them about two inches apart. This allows room for spreading. Bake for 10-12 minutes, or until the edges are set. Keep an eye on them; you want them soft in the center but firm around the edges!
Step 8: Cool and Decorate
Once baked, let the cookies cool on the baking sheet for a few minutes before transferring them to a wire rack. This cooling time helps them firm up. Once cooled, use black icing to create spooky spiderweb designs on top. It’s the finishing touch that makes these cookies truly irresistible!
Tips for Success
- Always use room temperature butter for easier creaming.
- Measure flour correctly by spooning it into the cup and leveling it off.
- Don’t skip the cooling time; it helps the cookies set properly.
- Experiment with different chocolate chips for unique flavors.
- Store cookies in an airtight container to keep them fresh longer.
Equipment Needed
- Mixing bowls: A large bowl for mixing and a smaller one for dry ingredients. You can use any size you have on hand.
- Electric mixer: Ideal for creaming, but a whisk works too if you’re feeling strong!
- Baking sheet: A standard one will do, or use a stoneware pan for even baking.
- Parchment paper: Great for easy cleanup; aluminum foil can be a substitute.
- Wire rack: Perfect for cooling cookies, but a plate works in a pinch!
Variations
- Gluten-Free: Substitute all-purpose flour with a gluten-free blend for a delicious alternative.
- Nutty Twist: Add chopped nuts like walnuts or pecans for extra crunch and flavor.
- Minty Fresh: Incorporate mint extract instead of vanilla for a refreshing twist.
- Spicy Kick: Add a pinch of cayenne pepper or cinnamon for a warm, spicy flavor.
- Vegan Option: Use coconut oil instead of butter and flax eggs as a substitute for regular eggs.
Serving Suggestions
- Pair these cookies with a glass of cold milk for a classic treat.
- Serve alongside a warm cup of hot cocoa for a cozy dessert experience.
- For a festive touch, arrange cookies on a Halloween-themed platter.
- Consider adding a scoop of vanilla ice cream for an indulgent dessert.
FAQs about Irresistible Spiderweb Chocolate Cookies for Halloween Fun
Can I make these cookies ahead of time?
Absolutely! You can prepare the dough in advance and refrigerate it for up to three days. Just scoop and bake when you’re ready for some Halloween fun!
What can I use instead of black icing for decoration?
If you don’t have black icing, you can use melted dark chocolate or even a chocolate ganache. Just drizzle it over the cooled cookies for a spooky effect!
How do I store the cookies to keep them fresh?
Store your cookies in an airtight container at room temperature. They’ll stay fresh for up to a week, but I doubt they’ll last that long!
Can I freeze these cookies?
Yes! You can freeze the baked cookies for up to three months. Just make sure to place them in a freezer-safe container. Thaw them at room temperature before serving.
What’s the best way to serve these cookies at a Halloween party?
Arrange them on a spooky platter with some Halloween-themed decorations. You can even add some fake spiders for a fun touch. They’ll be the star of your dessert table!
Summarizing the Joy of Irresistible Spiderweb Chocolate Cookies for Halloween Fun
There’s something magical about baking these Irresistible Spiderweb Chocolate Cookies for Halloween Fun. The joy of mixing ingredients, the delightful aroma wafting through your home, and the excitement of decorating each cookie create cherished memories. Watching your loved ones’ faces light up as they take that first bite is priceless. These cookies are more than just a treat; they’re a way to celebrate the season and bring everyone together. So, roll up your sleeves, embrace the mess, and enjoy the sweet moments that come with baking. Trust me, these cookies will become a Halloween tradition in your home!
PrintIrresistible Spiderweb Chocolate Cookies for Halloween Joy!

Delicious chocolate cookies decorated with a spooky spiderweb design, perfect for Halloween festivities.
- Prep Time: 20 minutes
- Cook Time: 12 minutes
- Total Time: 32 minutes
- Yield: 24 cookies 1x
- Category: Dessert
- Method: Baking
- Cuisine: American
- Diet: Vegetarian
Ingredients
- 1 cup unsalted butter, softened
- 1 cup granulated sugar
- 1 cup brown sugar, packed
- 2 large eggs
- 2 teaspoons vanilla extract
- 2 cups all-purpose flour
- 3/4 cup unsweetened cocoa powder
- 1 teaspoon baking soda
- 1/2 teaspoon salt
- 1 cup white chocolate chips
- 1/2 cup black icing for decoration
Instructions
- Preheat the oven to 350°F (175°C).
- In a large bowl, cream together the butter, granulated sugar, and brown sugar until smooth.
- Add the eggs and vanilla extract, mixing well.
- In another bowl, whisk together the flour, cocoa powder, baking soda, and salt.
- Gradually add the dry ingredients to the wet ingredients, mixing until just combined.
- Fold in the white chocolate chips.
- Drop spoonfuls of dough onto a baking sheet lined with parchment paper.
- Bake for 10-12 minutes, or until the edges are set.
- Allow cookies to cool on the baking sheet for a few minutes before transferring to a wire rack.
- Once cooled, use black icing to create spiderweb designs on top of the cookies.
Notes
- For a more intense chocolate flavor, use dark cocoa powder.
- Store cookies in an airtight container for up to a week.
- Feel free to add Halloween-themed sprinkles for extra decoration.
Nutrition
- Serving Size: 1 cookie
- Calories: 150
- Sugar: 10g
- Sodium: 50mg
- Fat: 7g
- Saturated Fat: 4g
- Unsaturated Fat: 2g
- Trans Fat: 0g
- Carbohydrates: 20g
- Fiber: 1g
- Protein: 2g
- Cholesterol: 20mg
About the Author

Marianne
kitchen guide and fellow food
Hi, we’re Marianne Hi there, and welcome to Recipes Days! I’m Marianne, your kitchen guide and fellow food lover. If you’ve ever felt overwhelmed by complicated recipes or thought, “I don’t have time to cook something good,” I’ve been there too. That’s why Recipes Days exists—to make cooking feel effortless, fun, and full of flavor, no matter your experience level.


