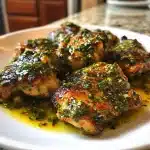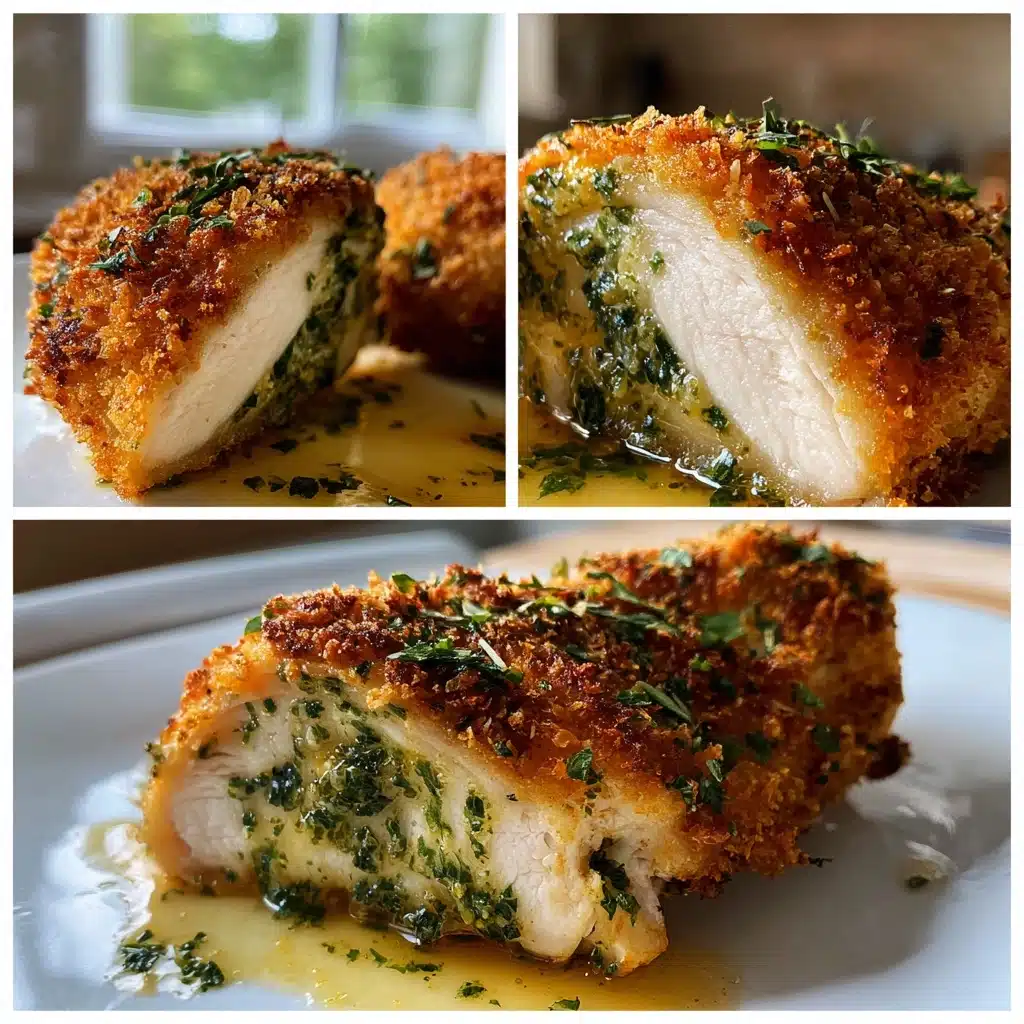
Easy Chicken Kiev: Crispy, Juicy, and Filled with Flavor
As a busy mom, I know how precious time can be, especially when it comes to dinner. That’s why I love this Easy Chicken Kiev: Crispy, Juicy, and Filled with Flavor. It’s a delightful dish that not only impresses my family but also brings a smile to their faces. The crispy exterior gives way to juicy chicken, bursting with flavorful garlic herb butter. Whether it’s a weeknight meal or a special occasion, this recipe is a quick solution that makes everyone feel like they’re dining at a fancy restaurant. Trust me, you’ll want to keep this one in your back pocket!
Why You’ll Love This Easy Chicken Kiev: Crispy, Juicy, and Filled with Flavor
This Easy Chicken Kiev is a lifesaver for busy evenings. It’s quick to prepare, taking just about 50 minutes from start to finish. The combination of crispy breadcrumbs and juicy chicken creates a flavor explosion that will have your family asking for seconds. Plus, it’s versatile enough to pair with any side dish, making it a go-to recipe for any occasion. You’ll love how simple yet impressive it is!
Ingredients for Easy Chicken Kiev: Crispy, Juicy, and Filled with Flavor
Gathering the right ingredients is the first step to creating this mouthwatering dish. Here’s what you’ll need:
- Boneless, skinless chicken breasts: The star of the show! They’re tender and easy to work with.
- Unsalted butter: This is the base for our garlic herb butter. Softened butter blends easily with the herbs.
- Garlic: Freshly minced garlic adds a punch of flavor that elevates the dish.
- Fresh parsley: This herb brings a bright, fresh taste to the butter.
- Fresh dill: Dill adds a unique flavor that pairs beautifully with chicken.
- Lemon juice: A splash of acidity brightens the butter and balances the richness.
- All-purpose flour: This is used for coating the chicken, helping to create that crispy exterior.
- Large eggs: Beaten eggs act as a binder for the breadcrumbs, ensuring they stick well.
- Breadcrumbs: They provide the crunch! You can use regular or panko for extra crispiness.
- Salt and pepper: Essential seasonings that enhance the overall flavor.
- Oil for frying: Choose a neutral oil with a high smoke point, like canola or vegetable oil.
For those looking to mix things up, consider adding a pinch of red pepper flakes for heat or substituting the herbs with your favorites. You can find the exact quantities for each ingredient at the bottom of the article, ready for printing!
How to Make Easy Chicken Kiev: Crispy, Juicy, and Filled with Flavor
Step 1: Preheat the Oven
Preheating the oven is crucial for even cooking. It ensures that your chicken cooks through without drying out. Set your oven to 375°F (190°C) while you prepare the rest of the dish. This way, when it’s time to bake, your chicken will be ready to go!
Step 2: Prepare the Garlic Herb Butter
In a mixing bowl, combine the softened butter, minced garlic, chopped parsley, dill, lemon juice, salt, and pepper. Use a fork to blend everything until smooth. This garlic herb butter is the heart of the dish, infusing the chicken with rich, savory flavors. You can even make this ahead of time and store it in the fridge!
Step 3: Pound the Chicken Breasts
To ensure even cooking and tenderness, place each chicken breast between two sheets of plastic wrap. Using a meat mallet or rolling pin, gently pound the chicken to an even thickness, about half an inch. This technique helps the chicken cook uniformly and keeps it juicy.
Step 4: Fill and Roll the Chicken
Take a generous portion of the garlic herb butter and place it in the center of each chicken breast. Fold the sides over the butter and roll the chicken tightly, tucking in the ends. Secure with toothpicks if needed. This step is key to keeping that delicious butter inside while cooking!
Step 5: Coat the Chicken
Coating the chicken is essential for that crispy texture. First, dredge each roll in flour, shaking off the excess. Next, dip it into the beaten eggs, allowing any extra to drip off. Finally, roll the chicken in breadcrumbs, pressing gently to ensure they stick well. This creates a beautiful crust!
Step 6: Fry the Chicken
Heat oil in a skillet over medium heat. Once hot, carefully add the chicken rolls, frying them until golden brown on all sides, about 3-4 minutes per side. This step adds a delightful crunch and locks in the moisture. Don’t rush it; let that crust develop!
Step 7: Bake the Chicken
Transfer the fried chicken to a baking dish and pop it in the preheated oven. Bake for 15-20 minutes, or until the chicken is cooked through and the internal temperature reaches 165°F (75°C). This final step ensures your chicken is juicy and safe to eat!
Tips for Success
- Make sure your butter is softened for easy mixing and spreading.
- Don’t skip the pounding step; it’s key for tender chicken.
- Use a thermometer to check the chicken’s doneness for perfect results.
- Let the chicken rest for a few minutes after baking to keep it juicy.
- Experiment with different herbs to customize the flavor to your liking.
Equipment Needed
- Meat mallet or rolling pin: For pounding the chicken. A heavy skillet can work in a pinch.
- Mixing bowls: Essential for combining the garlic herb butter. Any bowl will do!
- Skillet: For frying the chicken. A non-stick pan makes cleanup easier.
- Baking dish: To finish cooking the chicken in the oven. A glass or metal dish works well.
- Toothpicks: To secure the chicken rolls. Kitchen twine is a great alternative.
Variations of Easy Chicken Kiev: Crispy, Juicy, and Filled with Flavor
- Cheese-Stuffed: Add a slice of mozzarella or cheddar cheese inside the chicken roll for a gooey surprise.
- Mushroom Medley: Sauté finely chopped mushrooms with garlic and mix them into the butter for an earthy flavor.
- Spicy Kick: Incorporate a teaspoon of chili powder or red pepper flakes into the garlic herb butter for a zesty twist.
- Herb Variations: Swap out parsley and dill for basil or thyme to create a different flavor profile.
- Gluten-Free Option: Use gluten-free breadcrumbs and flour to make this dish suitable for gluten-sensitive diets.
Serving Suggestions for Easy Chicken Kiev: Crispy, Juicy, and Filled with Flavor
- Classic Sides: Serve with buttery mashed potatoes or a fresh garden salad for a balanced meal.
- Wine Pairing: A crisp white wine, like Sauvignon Blanc, complements the flavors beautifully.
- Presentation: Garnish with lemon wedges and fresh herbs for a pop of color on the plate.
FAQs about Easy Chicken Kiev: Crispy, Juicy, and Filled with Flavor
Can I make Easy Chicken Kiev ahead of time?
Absolutely! You can prepare the chicken rolls and refrigerate them for up to 24 hours before frying and baking. This makes it a great option for meal prep!
What can I serve with Easy Chicken Kiev?
This dish pairs wonderfully with mashed potatoes, steamed vegetables, or a light salad. The crispy, juicy chicken complements a variety of sides!
Can I bake the chicken instead of frying it?
Yes! For a healthier option, you can skip the frying and bake the chicken rolls directly in the oven. Just brush them with a little oil before baking for a crispy texture.
How do I know when the chicken is cooked through?
The best way to check is by using a meat thermometer. The internal temperature should reach 165°F (75°C) for safe consumption. This ensures your chicken is juicy and perfectly cooked!
Can I freeze Easy Chicken Kiev?
Yes, you can freeze the uncooked chicken rolls. Just wrap them tightly in plastic wrap and store them in an airtight container. When you’re ready to cook, thaw them in the fridge overnight before frying and baking.
Summarizing the Joy of Easy Chicken Kiev: Crispy, Juicy, and Filled with Flavor
There’s something truly special about serving up Easy Chicken Kiev: Crispy, Juicy, and Filled with Flavor. The moment you cut into that golden crust and watch the garlic herb butter ooze out, it’s pure magic. This dish not only satisfies the taste buds but also brings families together around the dinner table. It’s a recipe that transforms an ordinary evening into a delightful culinary adventure. Whether you’re celebrating a special occasion or just enjoying a cozy night in, this chicken Kiev will surely become a cherished favorite in your home. Enjoy every crispy, juicy bite!
Easy Chicken Kiev: Discover the Crispy, Juicy Flavor!

A simple and delicious recipe for Chicken Kiev that is crispy on the outside and juicy on the inside, filled with flavorful garlic herb butter.
- Prep Time: 20 minutes
- Cook Time: 30 minutes
- Total Time: 50 minutes
- Yield: 4 servings 1x
- Category: Main Course
- Method: Baking and Frying
- Cuisine: Eastern European
- Diet: Gluten Free
Ingredients
- 4 boneless, skinless chicken breasts
- 1/2 cup unsalted butter, softened
- 2 cloves garlic, minced
- 2 tablespoons fresh parsley, chopped
- 1 tablespoon fresh dill, chopped
- 1 teaspoon lemon juice
- 1 cup all-purpose flour
- 2 large eggs, beaten
- 2 cups breadcrumbs
- Salt and pepper to taste
- Oil for frying
Instructions
- Preheat the oven to 375°F (190°C).
- In a bowl, mix the softened butter, garlic, parsley, dill, lemon juice, salt, and pepper until well combined.
- Place the chicken breasts between two sheets of plastic wrap and pound them to an even thickness.
- Take a portion of the garlic herb butter and place it in the center of each chicken breast. Fold the sides over and roll tightly, securing with toothpicks if necessary.
- Coat each chicken roll in flour, dip in beaten eggs, and then coat with breadcrumbs.
- Heat oil in a skillet over medium heat and fry the chicken rolls until golden brown on all sides.
- Transfer the chicken to a baking dish and bake in the preheated oven for 15-20 minutes, or until cooked through.
- Remove from the oven, let rest for a few minutes, then serve hot.
Notes
- Make sure the butter is softened for easy mixing.
- You can prepare the garlic herb butter in advance and refrigerate it.
- For a healthier option, you can bake the chicken instead of frying.
Nutrition
- Serving Size: 1 chicken roll
- Calories: 450
- Sugar: 1g
- Sodium: 600mg
- Fat: 30g
- Saturated Fat: 12g
- Unsaturated Fat: 15g
- Trans Fat: 0g
- Carbohydrates: 30g
- Fiber: 2g
- Protein: 25g
- Cholesterol: 100mg
About the Author

Marianne
kitchen guide and fellow food
Hi, we’re Marianne Hi there, and welcome to Recipes Days! I’m Marianne, your kitchen guide and fellow food lover. If you’ve ever felt overwhelmed by complicated recipes or thought, “I don’t have time to cook something good,” I’ve been there too. That’s why Recipes Days exists—to make cooking feel effortless, fun, and full of flavor, no matter your experience level.