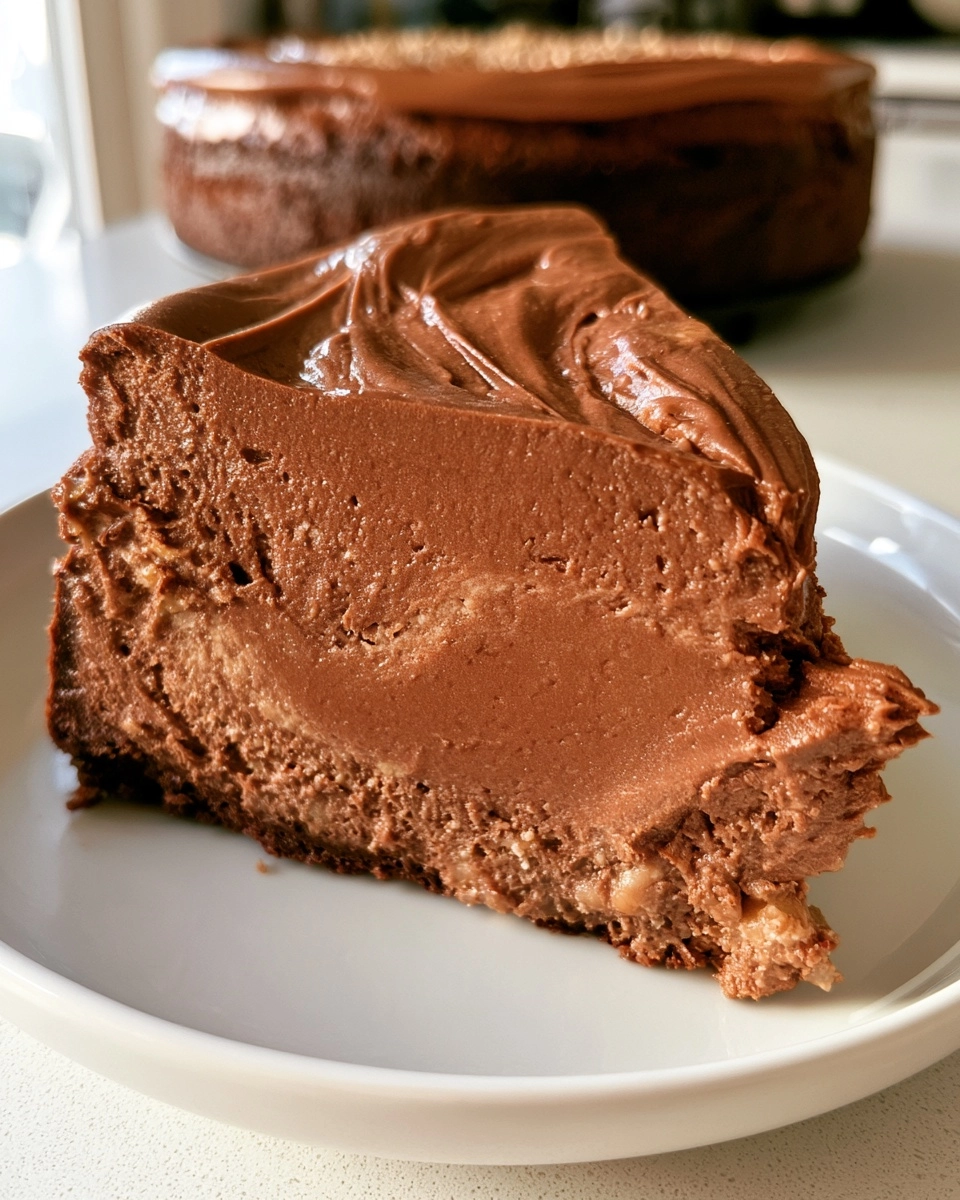
Chocolate Hazelnut Protein Cheesecake
Are you craving something sweet but want to keep it healthy? Look no further than this Chocolate Hazelnut Protein Cheesecake! This delightful dessert is not only rich and creamy but also packed with protein, making it a guilt-free indulgence. Perfect for busy moms and professionals, it’s an easy way to satisfy your sweet tooth without the extra calories. Whether it’s a family gathering, a special occasion, or just a treat for yourself, this cheesecake is sure to impress. With its luscious chocolate flavor and nutty hazelnut undertones, it’s a dessert that’s both satisfying and simple to make!
Why You’ll Love This Chocolate Hazelnut Protein Cheesecake
This Chocolate Hazelnut Protein Cheesecake is a dream come true for busy lives! It’s easy to make, so even novice bakers can whip it up without stress. The flavor is a heavenly blend of rich chocolate and nutty hazelnut, making it irresistible. Plus, it’s family-friendly, appealing to both kids and adults alike. Best of all, you can make it ahead of time, allowing you to enjoy your gatherings without the last-minute rush!
Easy to Make
With just a few simple steps, you’ll have a delicious cheesecake ready to bake!
Delicious Flavor
The combination of chocolate and hazelnut creates a decadent taste that feels indulgent yet healthy.
Family-Friendly
This dessert is a hit with everyone, making it perfect for family gatherings or parties.
Make-Ahead Friendly
Prepare it in advance and let it chill, so you can focus on enjoying your time with loved ones.
Ingredients Chocolate Hazelnut Protein Cheesecake
Main Ingredients
- Chocolate protein powder: Adds a rich chocolate flavor and boosts the protein content.
- Hazelnut spread: Provides a creamy texture and nutty sweetness that complements the chocolate.
- Cream cheese: The base of the cheesecake, giving it that classic creamy consistency.
- Greek yogurt: Adds tanginess and creaminess while increasing the protein level.
- Honey or maple syrup: Natural sweeteners that enhance the flavor without overpowering it.
- Vanilla extract: A touch of vanilla elevates the overall taste, making it more aromatic.
- Crushed hazelnuts: For topping, they add a delightful crunch and extra nutty flavor.
Optional Add-Ins
- Fresh berries: Strawberries or raspberries can be added for a fruity twist.
- Chocolate chips: Sprinkle some on top for an extra chocolatey experience.
- Shredded coconut: For a tropical flair, add some toasted coconut flakes.
Ingredient Notes
- For a vegan version, substitute cream cheese with a plant-based alternative and use agave syrup instead of honey.
- When choosing hazelnut spread, look for brands with minimal added sugars and natural ingredients.
- Fresh cream cheese is recommended for the best texture, but you can use low-fat options if desired.
- Greek yogurt can be plain or flavored, but plain is best for controlling sweetness.
Kitchen Equipment
- Mixing bowl: A large bowl for combining ingredients; a stand mixer can also be used for ease.
- Springform pan: Essential for easy removal; a regular cake pan can work in a pinch.
- Measuring cups and spoons: For accurate ingredient measurements.
- Spatula: To scrape down the sides and mix thoroughly.
- Oven: For baking the cheesecake to perfection.
How to Make Chocolate Hazelnut Protein Cheesecake
Step 1: Prepare the Ingredients
Start by gathering all your ingredients. Make sure the cream cheese is softened; this helps it blend smoothly. Preheat your oven to 350°F (175°C) so it’s ready when you are. If you haven’t already, crush your hazelnuts for the topping. You can use a food processor or place them in a zip-top bag and crush them with a rolling pin. This will add a delightful crunch to your cheesecake!
Step 2: Mix or Assemble
In a large mixing bowl, combine the softened cream cheese, Greek yogurt, hazelnut spread, honey (or maple syrup), and vanilla extract. Use a hand mixer or a spatula to mix until everything is smooth and creamy. Then, gradually add the chocolate protein powder. Mix until fully incorporated. The batter should be thick and luscious, with no lumps. This is where the magic happens!
Step 3: Cook or Bake
Pour the cheesecake mixture into a greased springform pan. Spread it evenly with a spatula. Place it in the preheated oven and bake for 25-30 minutes. You’ll know it’s done when the edges are set, but the center still has a slight jiggle. Don’t worry; it will firm up as it cools. Keep an eye on it to avoid overbaking!
Step 4: Finish and Garnish
Once baked, remove the cheesecake from the oven and let it cool at room temperature for about 30 minutes. Then, refrigerate it for at least 4 hours, or overnight if you can wait! Before serving, sprinkle the top with crushed hazelnuts for that extra crunch and nutty flavor. You can also add fresh berries for a pop of color and flavor!
Step 5: Serve
When you’re ready to serve, carefully remove the sides of the springform pan. Slice the cheesecake into wedges and plate it up. This dessert is perfect on its own, but you can also pair it with a dollop of Greek yogurt or a drizzle of chocolate sauce for an extra treat. Enjoy your guilt-free indulgence!
Expert Tips for Success
- Use Fresh Ingredients: Fresh cream cheese and Greek yogurt make a big difference in flavor and texture.
- Don’t Overcook: Keep an eye on the cheesecake; it should have a slight jiggle in the center when done.
- Measure Accurately: Use measuring cups and spoons for precise ingredient amounts to ensure the best results.
- Follow Timing Carefully: Allow the cheesecake to cool and chill properly for the best flavor and texture.
- Common Pro Tips: If you want a smoother texture, blend the mixture longer and scrape down the sides of the bowl.
Recipe Variations
Healthier Version
- Use low-fat cream cheese and Greek yogurt to reduce calories.
- Replace honey or maple syrup with a sugar-free sweetener like stevia or erythritol.
Vegetarian Version
- Substitute cream cheese with a plant-based cream cheese alternative.
- Use agave syrup instead of honey for a vegan-friendly sweetener.
Gluten-Free Version
- Ensure that the hazelnut spread is gluten-free.
- Use gluten-free chocolate protein powder to keep it safe for those with gluten sensitivities.
Spicy Version
- Add a pinch of cayenne pepper or chili powder to the batter for a surprising kick.
- Top with a sprinkle of crushed red pepper flakes for a unique flavor contrast.
Extra Indulgent Version
- Mix in chocolate chips or chunks into the batter for extra chocolatey goodness.
- Drizzle melted chocolate or caramel sauce over the top before serving for a decadent finish.
What to Serve With Chocolate Hazelnut Protein Cheesecake
Side Dishes
- Fresh fruit salad for a refreshing contrast.
- Lightly sweetened whipped cream to enhance the cheesecake.
Sauces and Toppings
- Chocolate sauce drizzled on top for extra indulgence.
- Caramel sauce for a sweet, buttery flavor.
Drinks
- A cup of coffee or espresso pairs beautifully.
- Herbal tea for a soothing complement.
Desserts
- Serve with a scoop of vanilla ice cream for a classic touch.
- Chocolate-covered strawberries for a romantic flair.
Storage Instructions
Refrigerator
- Store leftover cheesecake in an airtight container in the refrigerator for up to 5 days.
- Make sure to cover it well to prevent it from absorbing any odors from the fridge.
Freezer
- If you want to keep it longer, wrap individual slices in plastic wrap and then place them in a freezer-safe container.
- Frozen cheesecake can last for up to 3 months. Just remember to label the container with the date!
Reheating
- To enjoy your cheesecake again, thaw it in the refrigerator overnight before serving.
- If you prefer it warm, you can microwave a slice for about 15-20 seconds, but be careful not to overheat it!
Common Mistakes to Avoid
- Not softening the cream cheese: Using cold cream cheese can lead to a lumpy batter.
- Overbaking the cheesecake: Keep an eye on it; the center should still jiggle slightly when done.
- Skipping the chilling time: Allowing the cheesecake to chill is crucial for the best texture and flavor.
- Using too much sweetener: Adjust the sweetness to your taste; too much can overpower the other flavors.
FAQs about Chocolate Hazelnut Protein Cheesecake
Can I make this ahead of time?
Absolutely! This Chocolate Hazelnut Protein Cheesecake is perfect for making ahead. Just prepare it, bake, and let it chill in the refrigerator for at least 4 hours or overnight. This way, you can enjoy it without the last-minute rush!
How do I know when the cheesecake is done?
The cheesecake is done when the edges are set, but the center still has a slight jiggle. It will firm up as it cools, so don’t worry if it looks a bit wobbly when you take it out of the oven!
Can I use a different protein powder?
Yes! While chocolate protein powder works best for this recipe, you can use vanilla or any other flavor you prefer. Just keep in mind that it may alter the overall taste of the cheesecake.
Is this cheesecake suitable for kids?
Definitely! This protein cheesecake is family-friendly and a great way to sneak in some extra protein. Kids will love the chocolatey flavor, and you can feel good about serving it to them!
What can I use instead of hazelnut spread?
If you don’t have hazelnut spread, you can substitute it with almond butter or peanut butter. Just remember that it will change the flavor profile slightly, but it will still be delicious!
Recipe Card
| Prep Time | 15 minutes |
|---|---|
| Cook Time | 30 minutes |
| Total Time | 4 hours 45 minutes |
| Servings | 8 servings |
| Calories | 220 per slice |
Ingredients
- 1 cup chocolate protein powder
- 1 cup hazelnut spread
- 2 cups cream cheese, softened
- 1/2 cup Greek yogurt
- 1/4 cup honey or maple syrup
- 1 teaspoon vanilla extract
- 1/2 cup crushed hazelnuts for topping
Instructions
- Preheat the oven to 350°F (175°C).
- In a mixing bowl, combine the cream cheese, Greek yogurt, hazelnut spread, honey, and vanilla extract until smooth.
- Add the chocolate protein powder and mix until fully incorporated.
- Pour the mixture into a greased springform pan.
- Bake for 25-30 minutes or until the center is set.
- Let it cool, then refrigerate for at least 4 hours before serving.
- Top with crushed hazelnuts before serving.
Notes
- For a vegan version, substitute cream cheese with a plant-based alternative and use agave syrup instead of honey.
- Store leftovers in the refrigerator for up to 5 days.
- Can be served with fresh berries for added flavor.
Indulge Guilt-Free with Chocolate Hazelnut Protein Cheesecake
This Chocolate Hazelnut Protein Cheesecake is not just a dessert; it’s a celebration of flavor and health! With its creamy texture and rich taste, you can indulge without the guilt. Perfect for any occasion, it’s sure to become a family favorite. I encourage you to try this recipe and experience the joy it brings to your table. If you love it as much as I do, please leave a review or comment below. Your feedback means the world to me and helps others discover this delightful treat!
PrintChocolate Hazelnut Protein Cheesecake: Indulge Guilt-Free!
A delicious and guilt-free chocolate hazelnut protein cheesecake that satisfies your sweet tooth while providing a healthy dose of protein.
- Prep Time: 15 minutes
- Cook Time: 30 minutes
- Total Time: 4 hours 45 minutes
- Yield: 8 servings 1x
- Category: Dessert
- Method: Baking
- Cuisine: American
- Diet: Low Calorie
Ingredients
- 1 cup chocolate protein powder
- 1 cup hazelnut spread
- 2 cups cream cheese, softened
- 1/2 cup Greek yogurt
- 1/4 cup honey or maple syrup
- 1 teaspoon vanilla extract
- 1/2 cup crushed hazelnuts for topping
Instructions
- Preheat the oven to 350°F (175°C).
- In a mixing bowl, combine the cream cheese, Greek yogurt, hazelnut spread, honey, and vanilla extract until smooth.
- Add the chocolate protein powder and mix until fully incorporated.
- Pour the mixture into a greased springform pan.
- Bake for 25-30 minutes or until the center is set.
- Let it cool, then refrigerate for at least 4 hours before serving.
- Top with crushed hazelnuts before serving.
Notes
- For a vegan version, substitute cream cheese with a plant-based alternative and use agave syrup instead of honey.
- Store leftovers in the refrigerator for up to 5 days.
- Can be served with fresh berries for added flavor.
Nutrition
- Serving Size: 1 slice
- Calories: 220
- Sugar: 10g
- Sodium: 150mg
- Fat: 12g
- Saturated Fat: 5g
- Unsaturated Fat: 7g
- Trans Fat: 0g
- Carbohydrates: 20g
- Fiber: 2g
- Protein: 15g
- Cholesterol: 40mg
About the Author

Marianne
kitchen guide and fellow food
Hi, we’re Marianne Hi there, and welcome to Recipes Days! I’m Marianne, your kitchen guide and fellow food lover. If you’ve ever felt overwhelmed by complicated recipes or thought, “I don’t have time to cook something good,” I’ve been there too. That’s why Recipes Days exists—to make cooking feel effortless, fun, and full of flavor, no matter your experience level.