
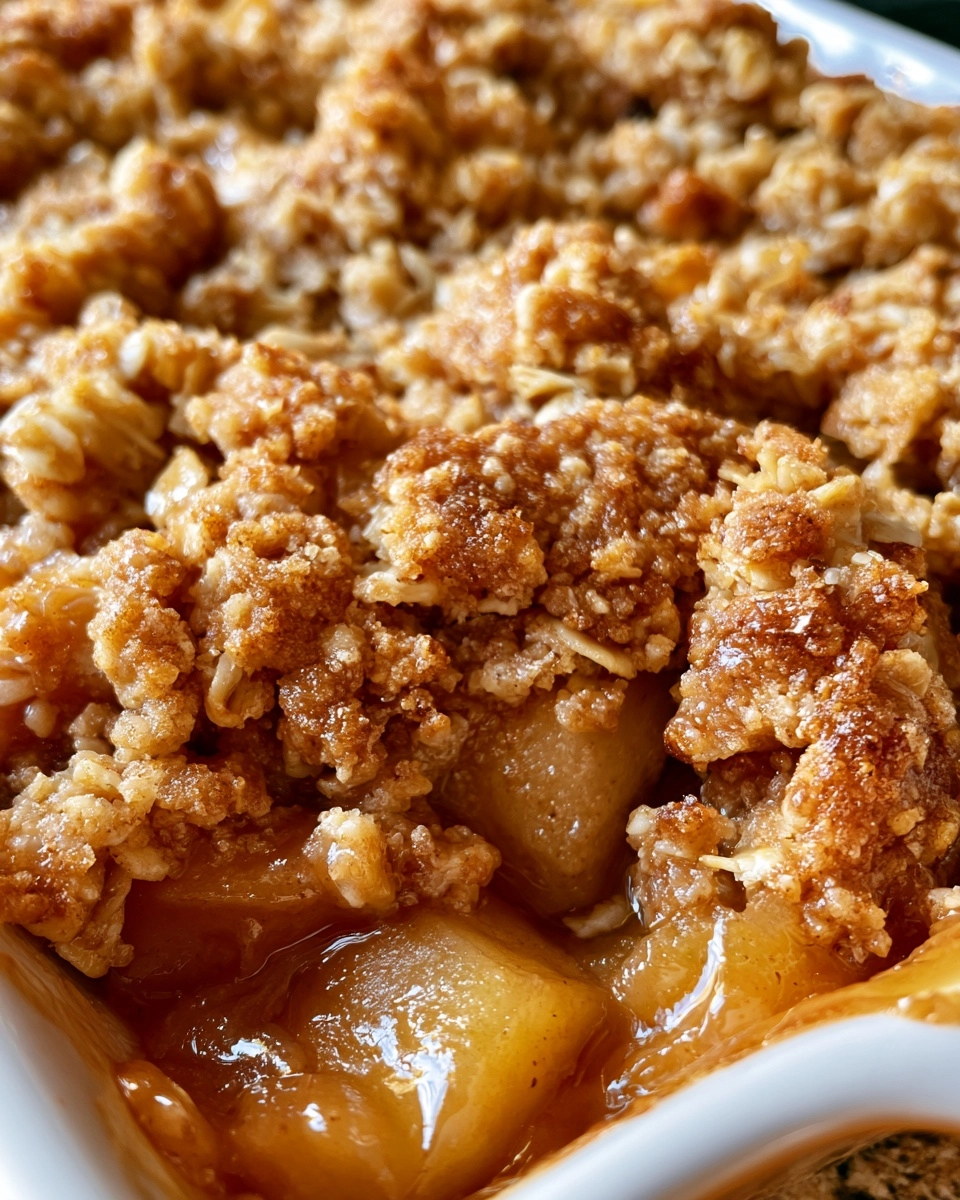
Apple Crisp — The Apple Crisp With the Crunchiest Topping
There’s something magical about the aroma of baked apples wafting through the kitchen, isn’t there? This Apple Crisp — The Apple Crisp With the Crunchiest Topping is not just a dessert; it’s a warm hug on a plate. Perfect for busy weeknights or special family gatherings, this dish combines tender, sweet apples with a crunchy, buttery topping that will have everyone coming back for seconds. With its delightful balance of flavors and textures, this recipe is easy enough for a novice cook yet impressive enough to wow your loved ones. Trust me, you’ll want to make this again and again!
Why You’ll Love This Apple Crisp — The Apple Crisp With the Crunchiest Topping
This Apple Crisp is a delightful treat that checks all the boxes for busy moms and professionals. It’s easy to make, with simple steps that even novice cooks can follow. The delicious flavor of sweet, baked apples paired with a crunchy topping is simply irresistible. Plus, it’s family-friendly, making it a hit with both kids and adults alike. And if you’re looking to save time, this dessert is make-ahead friendly, allowing you to prepare it in advance for those hectic days.
Easy to Make
With just a few simple steps, you can whip up this delicious dessert in no time.
Delicious Flavor
The combination of sweet apples and a crunchy topping creates a flavor explosion that’s hard to resist.
Family-Friendly
This dessert is a crowd-pleaser, perfect for family gatherings or cozy nights in.
Make-Ahead Friendly
Prepare it ahead of time, so you can enjoy more time with your loved ones.
Ingredients Apple Crisp — The Apple Crisp With the Crunchiest Topping
Main Ingredients
- Sliced apples: The star of the dish, providing natural sweetness and a tender texture.
- Brown sugar: Adds a rich, caramel-like sweetness that complements the apples beautifully.
- Rolled oats: These create a hearty, chewy texture in the topping, making it extra crunchy.
- All-purpose flour: Helps bind the topping together, giving it that perfect crumbly consistency.
- Unsalted butter: Adds richness and flavor to the topping, ensuring it bakes to a golden perfection.
- Cinnamon: A warm spice that enhances the apple flavor and adds a cozy aroma.
- Nutmeg: A hint of nutmeg brings depth and warmth to the overall flavor profile.
- Salt: Just a pinch to balance the sweetness and enhance all the flavors.
Optional Add-Ins
- Pears: Mix in some sliced pears for a delightful twist on the classic apple flavor.
- Berries: Add blueberries or raspberries for a burst of tartness and color.
- Nuts: Chopped walnuts or pecans can add an extra crunch and nutty flavor.
- Vanilla extract: A splash can elevate the flavor of the apples even more.
Ingredient Notes
- For the apples, I recommend using a mix of tart and sweet varieties like Granny Smith and Honeycrisp for the best flavor.
- If you’re looking for a healthier option, you can substitute coconut oil for butter or use less sugar.
- Fresh apples are best, but if you’re in a pinch, frozen sliced apples can work too—just make sure to thaw and drain them first.
- For gluten-free options, substitute all-purpose flour with a gluten-free flour blend.
Kitchen Equipment
- 9×13-inch baking dish: A standard size for this recipe; you can also use a similar-sized casserole dish.
- Mixing bowls: One large bowl for the apples and another for the topping.
- Measuring cups and spoons: Essential for accurate ingredient measurements.
- Knife and cutting board: For slicing the apples.
- Spatula: To mix and spread the topping evenly.
How to Make Apple Crisp — The Apple Crisp With the Crunchiest Topping
Step 1: Prepare the Ingredients
Start by preheating your oven to 350°F (175°C). While it warms up, grab your apples. You’ll need about 6 cups of sliced apples. I love using a mix of Granny Smith and Honeycrisp for the perfect balance of tart and sweet. Peel, core, and slice them into thin pieces. This helps them cook evenly and become tender. Once sliced, toss the apples in a large bowl with cinnamon, nutmeg, and a pinch of salt. This will enhance their natural sweetness.
Step 2: Mix or Assemble
Next, spread the apple mixture evenly in a greased 9×13-inch baking dish. Make sure the apples are distributed well so every bite is delicious. In another bowl, combine brown sugar, rolled oats, all-purpose flour, and melted butter. Mix these ingredients until they form a crumbly texture. This is the topping that will give your crisp its signature crunch! Once mixed, sprinkle this topping generously over the apples, covering them completely.
Step 3: Cook or Bake
Now it’s time to bake! Place your baking dish in the preheated oven and let it bake for 30-35 minutes. You’ll know it’s done when the topping is golden brown and the apples are bubbling. The aroma will fill your kitchen, making it hard to resist sneaking a taste!
Step 4: Finish and Garnish
Once baked, remove the dish from the oven and let it cool for about 10 minutes. This cooling time allows the juices to settle, making it easier to serve. If you want to elevate your dessert, consider adding a scoop of vanilla ice cream on top. The warm apple crisp paired with cold ice cream is a match made in heaven!
Step 5: Serve
Now, it’s time to dig in! Serve the apple crisp warm, either in bowls or right from the baking dish. Don’t forget to offer some extra toppings like whipped cream or a drizzle of caramel sauce for those who want to indulge a little more. Enjoy this delightful dessert with family and friends, and watch as they savor every crunchy, sweet bite!
Expert Tips for Success
- Use Fresh Ingredients: Fresh, crisp apples will give your apple crisp the best flavor and texture.
- Don’t Overcook: Keep an eye on the topping; it should be golden brown, but not burnt.
- Measure Accurately: Use precise measurements for the ingredients to ensure the perfect balance of flavors.
- Follow Timing Carefully: Stick to the baking time for the best results; every oven is different.
- Common Pro Tips: Let the crisp cool slightly before serving to help it set and make serving easier.
Recipe Variations
Healthier Version
- Substitute half of the brown sugar with unsweetened applesauce to reduce sugar content.
- Use coconut oil instead of butter for a dairy-free option.
- Incorporate whole wheat flour in place of all-purpose flour for added fiber.
Vegetarian Version
- This recipe is already vegetarian-friendly! Just ensure that any add-ins, like ice cream, are also vegetarian.
Gluten-Free Version
- Replace all-purpose flour with a gluten-free flour blend to make it suitable for gluten-sensitive diets.
- Check that your oats are certified gluten-free, as some brands may contain gluten.
Spicy Version
- Add a pinch of cayenne pepper or a dash of ginger for a surprising kick.
- Incorporate a teaspoon of cardamom for a warm, spicy flavor that complements the apples.
Extra Indulgent Version
- Mix in chocolate chips or caramel bits with the apple filling for a decadent twist.
- Top with a drizzle of caramel sauce and a scoop of salted caramel ice cream before serving.
What to Serve With Apple Crisp — The Apple Crisp With the Crunchiest Topping
Side Dishes
- Serve with a simple green salad for a refreshing contrast.
- Pair with roasted vegetables for a hearty meal.
Sauces and Toppings
- Drizzle with caramel sauce for extra sweetness.
- Add a dollop of whipped cream for a creamy finish.
Drinks
- Enjoy with a warm cup of spiced cider for a cozy vibe.
- A glass of sweet white wine complements the flavors beautifully.
Desserts
- Serve alongside a scoop of vanilla ice cream for a classic pairing.
- Offer chocolate chip cookies for a delightful dessert spread.
Storage Instructions
Refrigerator
- Store any leftover apple crisp in an airtight container in the refrigerator.
- It will keep well for up to 3-4 days, maintaining its delicious flavor and texture.
Freezer
- If you want to save it for later, you can freeze the apple crisp before baking.
- Wrap it tightly in plastic wrap and then in aluminum foil to prevent freezer burn.
- It can be frozen for up to 3 months. Just remember to label it with the date!
Reheating
- To reheat, simply place the apple crisp in a preheated oven at 350°F (175°C) for about 15-20 minutes.
- If reheating from frozen, bake it straight from the freezer for about 45-50 minutes, or until heated through.
- For a quick option, you can microwave individual portions for about 30-60 seconds, but the topping may lose some crunch.
Common Mistakes to Avoid
- Using the wrong type of apples: Stick to a mix of sweet and tart apples for the best flavor.
- Not greasing the baking dish: This can cause the crisp to stick, making it difficult to serve.
- Overmixing the topping: Mix just until crumbly; overmixing can lead to a dense topping.
- Skipping the cooling time: Letting it cool slightly helps the juices set, making it easier to serve.
FAQs about Apple Crisp — The Apple Crisp With the Crunchiest Topping
Can I make this ahead of time?
Absolutely! You can prepare the apple filling and topping separately and store them in the refrigerator. When you’re ready to bake, just assemble and pop it in the oven. This makes it a great option for busy days!
What type of apples are best for apple crisp?
I recommend using a mix of sweet and tart apples, like Granny Smith and Honeycrisp. This combination gives the best flavor and texture, ensuring your apple crisp is deliciously balanced.
Can I use other fruits in this recipe?
Yes! Feel free to mix in other fruits like pears or berries for a fun twist. Just keep in mind that different fruits may alter the baking time slightly.
How do I know when my apple crisp is done baking?
Your apple crisp is ready when the topping is golden brown and the apples are bubbling. The aroma will also fill your kitchen, making it hard to resist sneaking a taste!
Can I freeze apple crisp?
Yes, you can freeze apple crisp before baking. Just wrap it tightly in plastic wrap and aluminum foil. It can be frozen for up to 3 months. When you’re ready to enjoy it, bake it straight from the freezer!
Recipe Card
| Prep Time | 15 minutes |
|---|---|
| Cook Time | 35 minutes |
| Total Time | 50 minutes |
| Servings | 8 servings |
| Calories | 250 per serving |
Ingredients
- 6 cups of sliced apples
- 1 cup of brown sugar
- 1 cup of rolled oats
- 1 cup of all-purpose flour
- 1/2 cup of unsalted butter, melted
- 1 teaspoon of cinnamon
- 1/2 teaspoon of nutmeg
- 1/4 teaspoon of salt
Instructions
- Preheat the oven to 350°F (175°C).
- In a large bowl, mix sliced apples with cinnamon, nutmeg, and salt.
- Spread the apple mixture evenly in a greased baking dish.
- In another bowl, combine brown sugar, oats, flour, and melted butter.
- Mix until crumbly and then sprinkle over the apples.
- Bake for 30-35 minutes or until the topping is golden brown and the apples are tender.
- Let it cool slightly before serving.
Notes
- Serve warm with vanilla ice cream for an extra treat.
- Feel free to mix in other fruits like pears or berries.
- Store leftovers in an airtight container in the refrigerator.
Apple Crisp — The Apple Crisp With the Crunchiest Topping
This Apple Crisp is more than just a dessert; it’s a celebration of flavors and textures that brings joy to any table. The combination of sweet, tender apples and a crunchy topping creates a delightful experience that warms the heart. Whether you’re serving it at a family gathering or enjoying a quiet evening at home, this dish is sure to impress. I encourage you to try this recipe and share your thoughts! Your feedback means the world to me, so please leave a review or comment below. Happy baking!
PrintApple Crisp — Experience the Crunchiest Topping Today!
A delicious Apple Crisp featuring a crunchy topping that enhances the flavor of baked apples.
- Prep Time: 15 minutes
- Cook Time: 35 minutes
- Total Time: 50 minutes
- Yield: 8 servings 1x
- Category: Dessert
- Method: Baking
- Cuisine: American
- Diet: Vegetarian
Ingredients
- 6 cups of sliced apples
- 1 cup of brown sugar
- 1 cup of rolled oats
- 1 cup of all-purpose flour
- 1/2 cup of unsalted butter, melted
- 1 teaspoon of cinnamon
- 1/2 teaspoon of nutmeg
- 1/4 teaspoon of salt
Instructions
- Preheat the oven to 350°F (175°C).
- In a large bowl, mix sliced apples with cinnamon, nutmeg, and salt.
- Spread the apple mixture evenly in a greased baking dish.
- In another bowl, combine brown sugar, oats, flour, and melted butter.
- Mix until crumbly and then sprinkle over the apples.
- Bake for 30-35 minutes or until the topping is golden brown and the apples are tender.
- Let it cool slightly before serving.
Notes
- Serve warm with vanilla ice cream for an extra treat.
- Feel free to mix in other fruits like pears or berries.
- Store leftovers in an airtight container in the refrigerator.
Nutrition
- Serving Size: 1/8 of the recipe
- Calories: 250
- Sugar: 15g
- Sodium: 150mg
- Fat: 10g
- Saturated Fat: 5g
- Unsaturated Fat: 3g
- Trans Fat: 0g
- Carbohydrates: 38g
- Fiber: 3g
- Protein: 2g
- Cholesterol: 15mg
About the Author

Marianne
kitchen guide and fellow food
Hi, we’re Marianne Hi there, and welcome to Recipes Days! I’m Marianne, your kitchen guide and fellow food lover. If you’ve ever felt overwhelmed by complicated recipes or thought, “I don’t have time to cook something good,” I’ve been there too. That’s why Recipes Days exists—to make cooking feel effortless, fun, and full of flavor, no matter your experience level.


