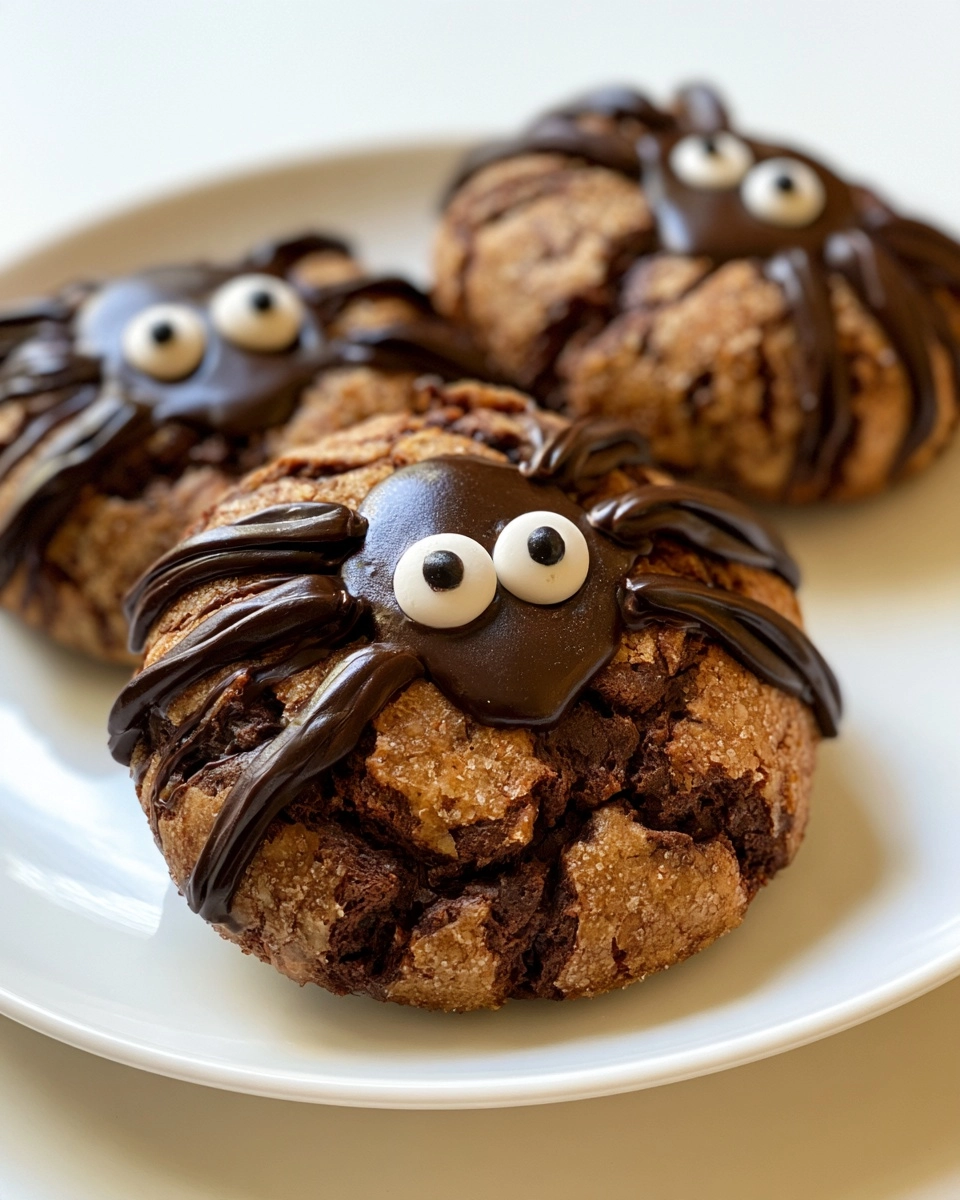
Chocolate Spider Cookies: The Creepy-Cute Bake Ready in 20 Minutes!
As a busy mom, I know how precious time can be, especially when you want to whip up something fun and festive. That’s where these Chocolate Spider Cookies come in! They’re not just deliciously chocolatey; they’re also adorably spooky, making them perfect for Halloween parties or any playful gathering. With a soft, chewy texture and a rich cocoa flavor, these cookies are a hit with both kids and adults. Plus, they come together in just 20 minutes, making them an easy solution for a busy day. Let’s get baking!
Why You’ll Love This Chocolate Spider Cookies
These Chocolate Spider Cookies are a delightful treat that everyone will adore! They’re incredibly easy to make, even for those who might not consider themselves bakers. The rich chocolate flavor is sure to satisfy any sweet tooth, while the fun spider design adds a playful touch. Plus, they’re family-friendly, making them a great activity to do with your kids. And if you’re planning ahead, these cookies are make-ahead friendly, so you can enjoy them whenever the mood strikes!
Easy to Make
With just a few simple steps, you’ll have these cookies ready in no time!
Delicious Flavor
The combination of cocoa powder and sugars creates a rich, chocolatey taste that’s hard to resist.
Family-Friendly
Kids love the spooky design, and they’re perfect for family gatherings or school events.
Make-Ahead Friendly
These cookies can be baked in advance and stored for later enjoyment, making them a great option for busy schedules.
Ingredients for Chocolate Spider Cookies
Main Ingredients
- All-purpose flour: The base for our cookies, providing structure.
- Unsweetened cocoa powder: Adds that rich chocolate flavor we all love.
- Granulated sugar: Sweetens the cookies and helps with texture.
- Brown sugar: Adds moisture and a hint of caramel flavor.
- Unsalted butter: Gives the cookies a rich, buttery taste and chewy texture.
- Large egg: Binds the ingredients together and adds moisture.
- Vanilla extract: Enhances the overall flavor profile.
- Baking soda: Helps the cookies rise and become fluffy.
- Salt: Balances the sweetness and enhances the flavors.
- Chocolate candies: Used for the eyes, adding a fun and spooky touch.
- Licorice strings: Perfect for creating the spider legs, adding a playful element.
Optional Add-Ins
- Dark chocolate chips: For an extra chocolatey bite.
- Chopped nuts: Adds crunch and flavor, if your family enjoys them.
- Sprinkles: For a festive touch, especially around Halloween.
Ingredient Notes
- For a more intense chocolate flavor, consider using dark cocoa powder instead of regular cocoa.
- If you’re out of unsalted butter, you can use salted butter but reduce the added salt in the recipe.
- Feel free to substitute the all-purpose flour with a gluten-free blend if needed.
- Using fresh ingredients, especially eggs and butter, will yield the best results.
Kitchen Equipment
- Baking sheet: A standard cookie sheet works well, or you can use a stoneware baking pan.
- Parchment paper: This helps prevent sticking; aluminum foil can be a substitute.
- Mixing bowls: Any size will do, but a large bowl is ideal for mixing.
- Measuring cups and spoons: Essential for accurate ingredient measurements.
- Cookie scoop or spoon: For portioning the dough; a tablespoon works too.
How to Make Chocolate Spider Cookies
Step 1: Prepare the Ingredients
First things first, let’s gather all our ingredients. Measure out the flour, cocoa powder, sugars, butter, egg, vanilla, baking soda, and salt. It’s helpful to have everything ready to go. Preheat your oven to 350°F (175°C) so it’s nice and hot when we’re ready to bake. This step is crucial for getting those cookies to rise perfectly!
Step 2: Mix or Assemble
In a large mixing bowl, cream together the softened butter, granulated sugar, and brown sugar until the mixture is smooth and fluffy. This usually takes about 2-3 minutes. Next, add the egg and vanilla extract, mixing well until everything is combined. In another bowl, whisk together the flour, cocoa powder, baking soda, and salt. Gradually add this dry mixture to the wet ingredients, stirring until just combined. Don’t overmix; we want our cookies to be soft and chewy!
Step 3: Cook or Bake
Now it’s time to bake! Using a cookie scoop or a spoon, drop spoonfuls of dough onto a baking sheet lined with parchment paper. Make sure to leave some space between each cookie, as they will spread a little while baking. Pop the baking sheet into the preheated oven and bake for 10-12 minutes. You’ll know they’re done when the edges look set but the centers are still slightly soft. This will give you that perfect chewy texture!
Step 4: Finish and Garnish
Once the cookies are out of the oven, let them cool on the baking sheet for about 5 minutes. This helps them firm up a bit. After that, transfer them to a wire rack to cool completely. Once cooled, it’s time for the fun part! Decorate each cookie with chocolate candies for the eyes and use licorice strings to create spider legs. Get creative! You can even let the kids help with this part.
Step 5: Serve
Your Chocolate Spider Cookies are now ready to impress! Serve them at your next Halloween party, or just enjoy them as a fun treat at home. They’re sure to be a hit with everyone. Don’t forget to snap a few pictures before they disappear!
Expert Tips for Success
- Use Fresh Ingredients: Fresh eggs and butter make a noticeable difference in flavor and texture.
- Don’t Overcook: Keep an eye on your cookies; they should be soft in the center when you take them out.
- Measure Accurately: Use proper measuring cups for dry and wet ingredients to ensure the right consistency.
- Follow Timing Carefully: Stick to the baking time; even a minute can change the texture.
- Common Pro Tips: Let the cookies cool completely before decorating for the best results.
Recipe Variations
Healthier Version
- Substitute half of the all-purpose flour with whole wheat flour for added fiber.
- Use coconut sugar instead of granulated sugar for a lower glycemic index.
- Replace butter with unsweetened applesauce to reduce fat content.
Vegetarian Version
- This recipe is already vegetarian-friendly! Just ensure that the chocolate candies and licorice strings are also vegetarian.
Gluten-Free Version
- Use a gluten-free all-purpose flour blend in place of regular flour.
- Check that your baking soda is gluten-free, as some brands may contain gluten.
Spicy Version
- Add a pinch of cayenne pepper or chili powder to the dry ingredients for a surprising kick.
- Incorporate a dash of cinnamon for a warm, spicy flavor that complements the chocolate.
Extra Indulgent Version
- Mix in dark chocolate chips or chunks for an extra chocolatey experience.
- Drizzle melted chocolate over the cooled cookies for a decadent finish.
- Top with a sprinkle of sea salt to enhance the sweetness and richness.
What to Serve With Chocolate Spider Cookies
Side Dishes
- Serve with a spooky fruit platter featuring oranges and grapes for a healthy contrast.
- Pair with pumpkin spice popcorn for a festive crunch.
Sauces and Toppings
- Drizzle with chocolate sauce for an extra indulgent treat.
- Offer a side of whipped cream for dipping.
Drinks
- Hot chocolate topped with marshmallows makes a cozy pairing.
- Serve with apple cider for a seasonal touch.
Desserts
- Complement with ghost-shaped meringues for a fun dessert table.
- Include mini pumpkin pies for a classic fall flavor.
Storage Instructions
Refrigerator
- Store your Chocolate Spider Cookies in an airtight container at room temperature for up to a week.
- If you prefer them chilled, you can refrigerate them, but they may lose some of their chewy texture.
Freezer
- To freeze, place the cookies in a single layer on a baking sheet and freeze until solid.
- Once frozen, transfer them to a freezer-safe bag or container, separating layers with parchment paper.
- They can be stored in the freezer for up to three months.
Reheating
- To enjoy your cookies warm, preheat the oven to 350°F (175°C) and place the cookies on a baking sheet.
- Bake for about 5 minutes or until warmed through.
- You can also microwave them for about 10-15 seconds, but be careful not to overheat, as they can become tough.
Common Mistakes to Avoid
- Not measuring ingredients accurately, which can lead to cookies that are too dry or too wet.
- Overmixing the dough, resulting in tough cookies instead of soft and chewy ones.
- Skipping the cooling time before decorating, causing the toppings to melt or slide off.
- Not leaving enough space between cookies on the baking sheet, leading to them merging together while baking.
FAQs about Chocolate Spider Cookies
Can I make this ahead of time?
Absolutely! You can prepare the cookie dough in advance and store it in the refrigerator for up to 2 days. Just scoop and bake when you’re ready. You can also bake the cookies ahead of time and store them in an airtight container until you’re ready to decorate and serve.
How do I store leftover cookies?
Store your Chocolate Spider Cookies in an airtight container at room temperature for up to a week. If you want to keep them longer, consider freezing them. Just make sure to separate layers with parchment paper to prevent sticking.
Can I use different candies for the eyes?
Of course! While chocolate candies are traditional, you can get creative with gummy candies, candy corn, or even mini marshmallows. Just make sure whatever you choose is fun and fits the spooky theme!
What if I don’t have licorice strings?
No worries! If you don’t have licorice, you can use pretzel sticks, thin chocolate sticks, or even pipe chocolate to create spider legs. The goal is to have fun and be creative!
Can I make these cookies gluten-free?
Yes! Simply substitute the all-purpose flour with a gluten-free flour blend. Just ensure that your baking soda is also gluten-free, as some brands may contain gluten. Enjoy your spooky treats without worry!
Recipe Card for Chocolate Spider Cookies
| Prep Time | 10 minutes |
|---|---|
| Cook Time | 10 minutes |
| Total Time | 20 minutes |
| Servings | 12 cookies |
| Calories | 150 per cookie |
Ingredients
- 1 cup all-purpose flour
- 1/2 cup unsweetened cocoa powder
- 1/2 cup granulated sugar
- 1/2 cup brown sugar
- 1/2 cup unsalted butter, softened
- 1 large egg
- 1 teaspoon vanilla extract
- 1/2 teaspoon baking soda
- 1/4 teaspoon salt
- Chocolate candies for eyes
- Licorice strings for legs
Instructions
- Preheat your oven to 350°F (175°C).
- In a bowl, cream together the softened butter, granulated sugar, and brown sugar until smooth.
- Add the egg and vanilla extract, mixing well.
- In another bowl, whisk together the flour, cocoa powder, baking soda, and salt.
- Gradually add the dry ingredients to the wet mixture, stirring until combined.
- Drop spoonfuls of dough onto a baking sheet lined with parchment paper.
- Bake for 10-12 minutes or until set.
- Once cooled, decorate with chocolate candies for eyes and licorice strings for spider legs.
Notes
- For a more intense chocolate flavor, use dark cocoa powder.
- Make sure to let the cookies cool completely before decorating.
- These cookies can be stored in an airtight container for up to a week.
Enjoy Making Chocolate Spider Cookies!
There’s something truly magical about baking with your loved ones, especially when it involves these Chocolate Spider Cookies. They’re not just treats; they’re a fun way to create memories and share laughter in the kitchen. I hope you enjoy making these creepy-cute cookies as much as I do! Whether it’s for Halloween or just a fun family activity, they’re sure to bring smiles all around. If you try this recipe, I’d love to hear how it turned out for you! Please leave a review or comment below and share your spooky cookie creations!
PrintChocolate Spider Cookies: Bake These Creepy-Cute Treats Fast!

Delicious and spooky chocolate spider cookies that are perfect for Halloween or any fun occasion.
- Prep Time: 10 minutes
- Cook Time: 10 minutes
- Total Time: 20 minutes
- Yield: 12 cookies 1x
- Category: Dessert
- Method: Baking
- Cuisine: American
- Diet: Vegetarian
Ingredients
- 1 cup all-purpose flour
- 1/2 cup unsweetened cocoa powder
- 1/2 cup granulated sugar
- 1/2 cup brown sugar
- 1/2 cup unsalted butter, softened
- 1 large egg
- 1 teaspoon vanilla extract
- 1/2 teaspoon baking soda
- 1/4 teaspoon salt
- Chocolate candies for eyes
- Licorice strings for legs
Instructions
- Preheat your oven to 350°F (175°C).
- In a bowl, cream together the softened butter, granulated sugar, and brown sugar until smooth.
- Add the egg and vanilla extract, mixing well.
- In another bowl, whisk together the flour, cocoa powder, baking soda, and salt.
- Gradually add the dry ingredients to the wet mixture, stirring until combined.
- Drop spoonfuls of dough onto a baking sheet lined with parchment paper.
- Bake for 10-12 minutes or until set.
- Once cooled, decorate with chocolate candies for eyes and licorice strings for spider legs.
Notes
- For a more intense chocolate flavor, use dark cocoa powder.
- Make sure to let the cookies cool completely before decorating.
- These cookies can be stored in an airtight container for up to a week.
Nutrition
- Serving Size: 1 cookie
- Calories: 150
- Sugar: 10g
- Sodium: 50mg
- Fat: 7g
- Saturated Fat: 4g
- Unsaturated Fat: 2g
- Trans Fat: 0g
- Carbohydrates: 20g
- Fiber: 1g
- Protein: 2g
- Cholesterol: 20mg
About the Author

Marianne
kitchen guide and fellow food
Hi, we’re Marianne Hi there, and welcome to Recipes Days! I’m Marianne, your kitchen guide and fellow food lover. If you’ve ever felt overwhelmed by complicated recipes or thought, “I don’t have time to cook something good,” I’ve been there too. That’s why Recipes Days exists—to make cooking feel effortless, fun, and full of flavor, no matter your experience level.