
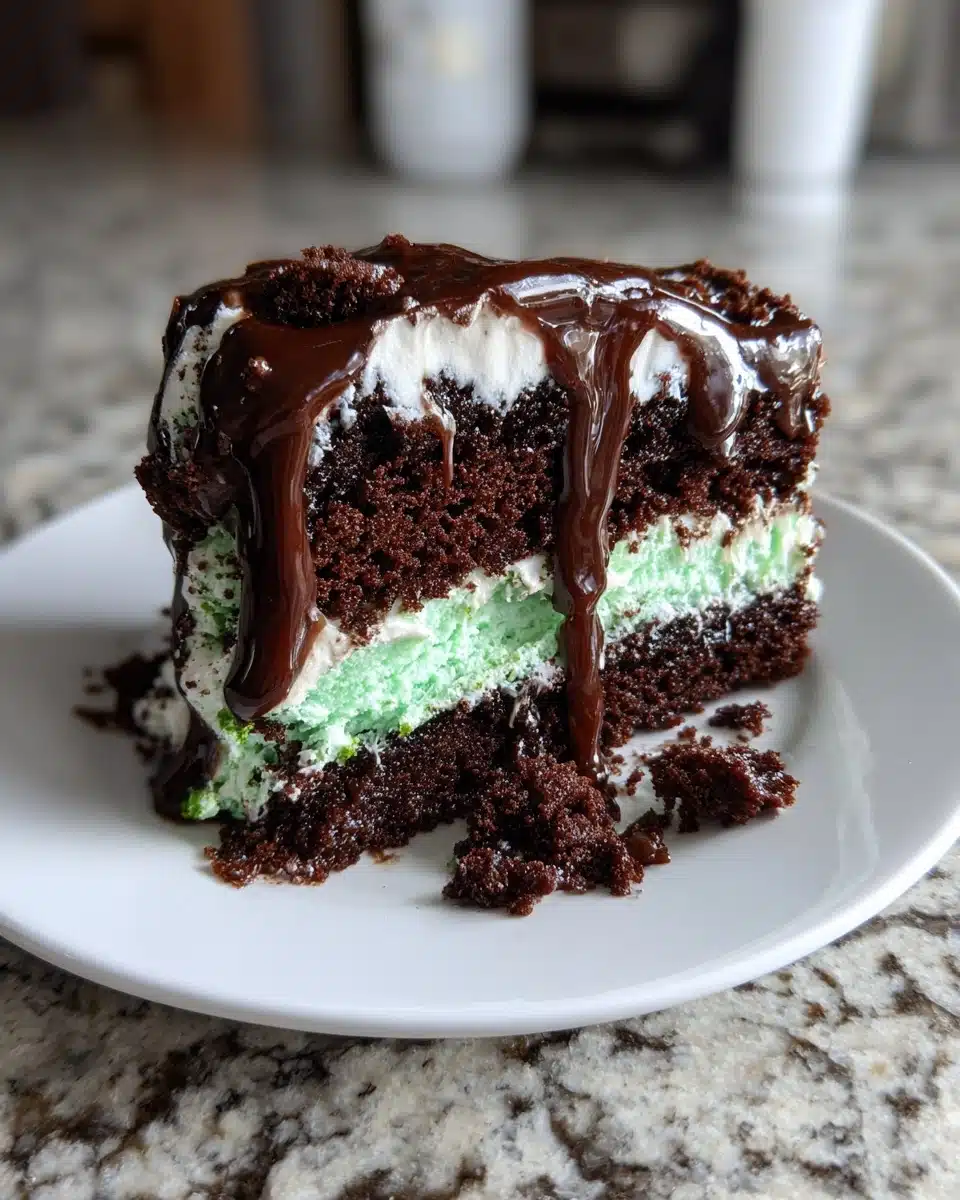
Grasshopper Earthquake Cake — Minty, Chocolatey & Impossibly Gooey
As a busy mom, I know how precious time can be, especially when it comes to whipping up something special for my family. That’s why I adore this Grasshopper Earthquake Cake — minty, chocolatey, and impossibly gooey! It’s the perfect dessert to impress your loved ones without spending hours in the kitchen. With just a few simple ingredients, you can create a decadent treat that will have everyone asking for seconds. Trust me, this cake is not just a dessert; it’s a delightful experience that brings smiles and sweet memories to the table!
Why You’ll Love This Grasshopper Earthquake Cake
This Grasshopper Earthquake Cake is a game-changer for busy days. It’s quick to prepare, taking just 20 minutes of your time. The combination of mint and chocolate creates a flavor explosion that’s simply irresistible. Plus, it’s a crowd-pleaser! Whether it’s a family gathering or a last-minute get-together, this cake will steal the show. You’ll love how effortlessly it transforms any occasion into a sweet celebration!
Ingredients for Grasshopper Earthquake Cake
Gathering the right ingredients is the first step to creating this delightful Grasshopper Earthquake Cake. Here’s what you’ll need:
- Chocolate cake mix: This is the base of our cake, providing a rich, chocolatey flavor that pairs perfectly with mint.
- Water: Essential for mixing the cake batter, it helps achieve the right consistency.
- Vegetable oil: This adds moisture to the cake, ensuring it stays soft and gooey.
- Large eggs: Eggs act as a binding agent, giving the cake structure and richness.
- Mint chocolate chips: These little gems are the star of the show, infusing the cake with a refreshing minty flavor.
- Cream cheese: Softened cream cheese creates a luscious layer that adds creaminess and tang.
- Powdered sugar: This sweetens the cream cheese mixture, making it a delightful topping.
- Green food coloring: A fun addition that gives the cake its signature minty hue, making it visually appealing.
- Crushed Oreos: These add a crunchy texture and a hint of chocolate, enhancing the overall flavor.
- Whipped cream: For topping, it adds a light and airy finish to each slice.
For those who want an extra kick of mint, consider adding a splash of mint extract to the batter. You can find all the exact measurements at the bottom of the article, ready for printing. Happy baking!
How to Make Grasshopper Earthquake Cake
Now that we have our ingredients ready, let’s dive into the fun part: making this Grasshopper Earthquake Cake! Follow these simple steps, and you’ll have a delicious dessert that’s sure to impress.
Step 1: Preheat the Oven
First things first, preheat your oven to 350°F (175°C). Preheating is crucial because it ensures that your cake bakes evenly. A hot oven helps the cake rise beautifully, giving it that perfect texture. Trust me, you don’t want to skip this step!
Step 2: Prepare the Cake Batter
In a large bowl, combine the chocolate cake mix, water, vegetable oil, and eggs. Mix until smooth. Each ingredient plays a vital role: the cake mix provides flavor, the water adds moisture, the oil keeps it gooey, and the eggs bind everything together. It’s like a team working towards a delicious goal!
Step 3: Fold in Mint Chocolate Chips
Now, it’s time to fold in those mint chocolate chips. These little morsels are the heart of our Grasshopper Earthquake Cake. They not only enhance the flavor but also add delightful pockets of gooeyness throughout the cake. Just gently mix them in to keep that lovely texture!
Step 4: Pour Batter into Baking Pan
Next, pour the batter into a greased 9×13 inch baking pan. Make sure to grease the pan well to prevent sticking. I like to use cooking spray or butter for this. Pouring the batter evenly helps the cake bake uniformly, so take your time here!
Step 5: Make the Cream Cheese Mixture
In another bowl, beat the softened cream cheese and powdered sugar until smooth. This creamy layer is what makes our cake so special. It adds a rich, tangy flavor that perfectly balances the sweetness of the cake. Don’t forget to add the green food coloring for that fun minty look!
Step 6: Swirl the Cream Cheese Mixture
Drop spoonfuls of the cream cheese mixture over the cake batter. Then, take a knife and gently swirl it through the batter. This technique creates beautiful marbled patterns and ensures that every bite is a delightful surprise. It’s like painting a masterpiece, but edible!
Step 7: Add Crushed Oreos
Now, sprinkle the crushed Oreos on top. These crunchy bits add texture and a hint of chocolate that complements the minty flavor. Plus, who doesn’t love Oreos? They’re the cherry on top of this already fabulous cake!
Step 8: Bake the Cake
Pop the cake into the preheated oven and bake for 30-35 minutes. To check for doneness, insert a toothpick into the center. If it comes out clean, your cake is ready! If not, give it a few more minutes. The anticipation is part of the fun!
Step 9: Cool and Serve
Once baked, let the cake cool in the pan for a bit. This helps it set and makes it easier to cut. When you’re ready to serve, top each slice with a dollop of whipped cream. It adds a light, airy finish that makes every bite feel like a treat!
Tips for Success
- Always preheat your oven for even baking.
- Use room temperature eggs for better mixing.
- Don’t overmix the batter; it can make the cake dense.
- Let the cake cool completely before cutting for cleaner slices.
- Experiment with different toppings like chocolate drizzle or mint leaves.
Equipment Needed
- 9×13 inch baking pan (a round cake pan works too)
- Mixing bowls (any size will do)
- Electric mixer (a whisk can work if you’re feeling adventurous)
- Measuring cups and spoons (or just eyeball it if you’re confident!)
- Spatula for folding and serving
Variations
- Gluten-Free Option: Substitute the chocolate cake mix with a gluten-free blend to make this cake suitable for those with gluten sensitivities.
- Mint Lovers Delight: Add a teaspoon of mint extract to the batter for an extra burst of minty flavor.
- Nutty Twist: Incorporate chopped walnuts or pecans into the batter for added crunch and flavor.
- Vegan Version: Use a vegan chocolate cake mix and replace eggs with flaxseed meal mixed with water for a plant-based treat.
- Chocolate Overload: Drizzle melted chocolate over the top before serving for a decadent finish.
Serving Suggestions
- Pair with a scoop of vanilla ice cream for a delightful contrast.
- Serve alongside fresh berries for a pop of color and freshness.
- Drizzle with chocolate sauce for an extra indulgent touch.
- Garnish with mint leaves for a beautiful presentation.
- Enjoy with a cup of coffee or mint tea to enhance the flavors.
FAQs about Grasshopper Earthquake Cake
Can I make Grasshopper Earthquake Cake ahead of time?
Absolutely! This cake can be made a day in advance. Just store it in the refrigerator, and it will stay fresh and delicious. The flavors may even deepen overnight, making it even more delightful!
How do I store leftovers?
Leftovers can be stored in an airtight container in the refrigerator for up to three days. Just make sure to top each slice with whipped cream right before serving for that fresh taste!
Can I freeze Grasshopper Earthquake Cake?
Yes, you can freeze this cake! Wrap it tightly in plastic wrap and then in aluminum foil. It can be frozen for up to three months. Just thaw it in the fridge overnight before serving.
What can I substitute for mint chocolate chips?
If you can’t find mint chocolate chips, regular chocolate chips work just fine. You can also add a few drops of mint extract to the batter for that minty flavor. It’s a great alternative!
Is this cake suitable for special diets?
This Grasshopper Earthquake Cake can be adapted for various diets. Use gluten-free cake mix for a gluten-free version, or try a vegan chocolate cake mix for a plant-based treat. The possibilities are endless!
Summarizing the Joy of Grasshopper Earthquake Cake
There’s something magical about baking a Grasshopper Earthquake Cake. The moment you pull it from the oven, the aroma of mint and chocolate fills your kitchen, wrapping you in a warm embrace. Each slice is a delightful adventure, with gooey layers and crunchy surprises that make every bite a celebration. Whether it’s a family gathering or a quiet evening at home, this cake brings joy and laughter to the table. It’s more than just a dessert; it’s a sweet memory in the making, reminding us that life is best enjoyed with a little indulgence and a lot of love!
Grasshopper Earthquake Cake: Indulge in Minty Delight!

A decadent dessert that combines mint and chocolate flavors in a gooey cake, perfect for any occasion.
- Prep Time: 20 minutes
- Cook Time: 35 minutes
- Total Time: 55 minutes
- Yield: 12 servings 1x
- Category: Dessert
- Method: Baking
- Cuisine: American
- Diet: Vegetarian
Ingredients
- 1 box chocolate cake mix
- 1 cup water
- 1/2 cup vegetable oil
- 3 large eggs
- 1 cup mint chocolate chips
- 1 cup cream cheese, softened
- 1 cup powdered sugar
- 1/2 cup green food coloring
- 1/2 cup crushed Oreos
- 1/2 cup whipped cream for topping
Instructions
- Preheat the oven to 350°F (175°C).
- In a large bowl, combine the chocolate cake mix, water, vegetable oil, and eggs. Mix until smooth.
- Fold in the mint chocolate chips.
- Pour the batter into a greased 9×13 inch baking pan.
- In another bowl, beat the cream cheese and powdered sugar until smooth. Add green food coloring and mix well.
- Drop spoonfuls of the cream cheese mixture over the cake batter and swirl with a knife.
- Sprinkle crushed Oreos on top.
- Bake for 30-35 minutes or until a toothpick comes out clean.
- Let cool and top with whipped cream before serving.
Notes
- For a stronger mint flavor, add mint extract to the batter.
- Store leftovers in the refrigerator for up to 3 days.
- Can be served warm or cold.
Nutrition
- Serving Size: 1 slice
- Calories: 350
- Sugar: 25g
- Sodium: 200mg
- Fat: 15g
- Saturated Fat: 8g
- Unsaturated Fat: 5g
- Trans Fat: 0g
- Carbohydrates: 50g
- Fiber: 2g
- Protein: 4g
- Cholesterol: 50mg
About the Author

Marianne
kitchen guide and fellow food
Hi, we’re Marianne Hi there, and welcome to Recipes Days! I’m Marianne, your kitchen guide and fellow food lover. If you’ve ever felt overwhelmed by complicated recipes or thought, “I don’t have time to cook something good,” I’ve been there too. That’s why Recipes Days exists—to make cooking feel effortless, fun, and full of flavor, no matter your experience level.


